ABB Panel 800 - PP846 Hardware and Installation
ABB Panel 800 - PP846 Hardware and Installation
Product Overview:
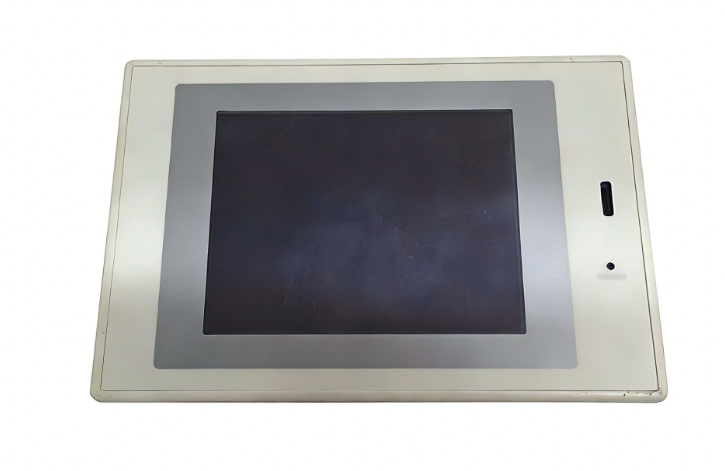
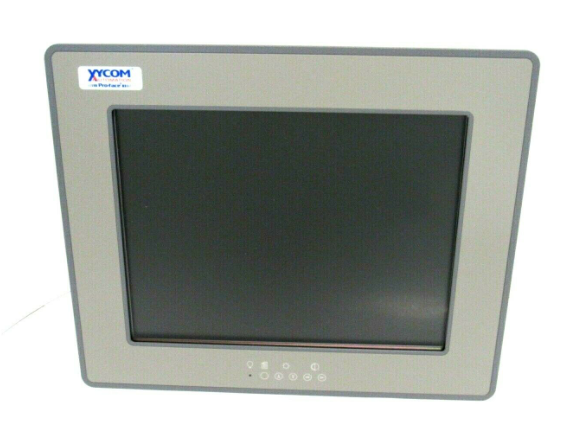
The Panel 800 - PP846 Operator Panel is designed to meet the needs of man-machine communication with functions for displaying and controlling text, dynamic indications, time channels, alarms and recipe handling.
It works on the basis of an object-oriented approach, configured on a PC with the help of Panel Builder 800, after which the project is transferred and stored in the panel.
The panel can be connected to a wide range of automation devices such as PLCs, servos or drives. The documentation also describes the release history of the Panel 800 series, version 5.1 with firmware 4.0.
Installation Guide
Installation Preparation: The thickness of the mounting plate is 1.5 - 9.0mm,
and a certain amount of space needs to be reserved around the panel during installation to ensure normal heat dissipation
and stable installation of the device.
The installation process includes checking the device for damage, cutting the opening, fixing the panel and connecting the cables.
When connecting cables, make sure that the electrical grounding of the panel and the controller system is consistent,
use the appropriate cable and tightening torque, and pay attention to the correct polarity of the voltage .
Mode Switch Settings: Four mode switches are provided on the back of the panel and should normally be in the OFF position and operated by qualified personnel only.
Different combinations of switches correspond to different functions, such as operating mode, system recovery, image loading,
service menu and self-test, etc., which facilitate users to operate and maintain the equipment in different modes.
Module Installation: The internal Compact Flash memory card can be installed to expand the project memory,
the installation should be operated with power off and care should be taken to avoid static electricity damage to the device.
Profibus DP extension module can also be installed, check the device before installation and pay attention to static electricity protection during installation.
In addition, the CB810 - USB to Ethernet Adapter is used for project-specific transfers and should be used in accordance with the relevant connection and usage restrictions.
Technical data
Basic parameters: specifies the dimensions, weight, protection class and other parameters of the device.
For example, the size of the front panel is 382 x 252 x 6mm, the mounting depth is 58mm (158mm including clearance),
the protection class of the front panel is IP66, the rear panel is IP20, and the weight is 2.5kg.
Interface types: A variety of interfaces are provided, including serial ports (RS422/RS485, RS232C),
Ethernet ports (Shielded RJ 45), USB ports (Host type A and Device type B), and a CF card slot for easy connection and data transfer with other devices.
Other parameters: 12 MB of application flash memory, real-time clock, power supply + 24V DC (20 - 30V DC).
The display parameters vary from model to model, e.g. the PP846 has a TFT-LCD display with 800 x 600 pixels,
64K colours and a CCFL backlight with a lifetime of more than 50,000 hours at 25°C. The display can be used for a wide range of applications.
Chemical Resistance
Metal housing: Made of powder coated aluminium, it has some resistance to some chemicals, such as acetic acid (10%),
citric acid (10%), etc., but has limited resistance to some chemicals.
In practice, if there is a possibility of exposure to specific chemicals, it is necessary to test the hidden parts of the metal casing first.
Touch Screen and Overlay:
Autotex F157/F207 covers the perimeter of the touch screen and has some resistance to a wide range of chemicals,
but is not suitable for long-term outdoor use.
The touch screen surface is resistant to some solvents and Autoflex EB Touch Display Protective Film has similar resistance to Autotex F157/F207.
Operation panel drawings: Pin signal diagrams of communication ports are given, including pin definitions of USB, Ethernet, RS-232, RS-422/485,
as well as pin configurations related to different models and panel outline drawings, etc., which provide intuitive references for connection and installation of equipment .
Precautions during installation
Installation Environmental Requirements:
Need to be installed on the plane without high risk of explosion, no strong magnetic field, no direct sunlight and no large temperature fluctuations,
indoor use, mounted on the plane surface of the 4X type housing. Avoid installing in places where
the environment is complex and prone to cause equipment failure or safety problems, such as flammable and explosive areas,
strong electromagnetic interference environment, etc., in order to ensure the normal operation of the equipment and the safety of personnel.
The upper limit of ambient temperature is 40°C for horizontal installation and 50°C for vertical installation,
too high or too low temperature may affect the performance and service life of the equipment.
Equipment Inspection and Guarding:
Before installation, the equipment should be carefully inspected for damage during transport,
and the supplier should be notified promptly if problems are found. When installing the equipment,
it should be gently held and put down to avoid damage caused by falling equipment.
Pay attention to static electricity protection during installation, especially when installing sensitive parts such as internal Compact Flash memory cards
and expansion modules, to prevent static electricity from damaging the device.
Operation specification and personnel qualification:
The installation must be carried out by qualified personnel to ensure that the installation is in line with the specifications to avoid damage to
the equipment or safety accidents caused by improper operation. The installation process should be carried out in strict accordance with the instructions,
follow the operating steps and requirements to ensure the accuracy and reliability of the installation.
Wiring and connection points
Electrical grounding:
Ensure that the operator panel and controller system have the same electrical ground (reference voltage level),
otherwise communication errors may occur.
Use M5 screws and a grounding conductor with a cross section of at least 2.5mm² for the grounding connection,
and keep the grounding conductor as short as possible.
Cable selection and separation:
Use only shielded communication cables and separate the high-voltage cables from the signal
and power supply cables to reduce electromagnetic interference and to ensure the stability of the signal transmission and the safety of
the equipment operation.
When connecting the power supply, make sure that the voltage and polarity are correct to avoid equipment damage due to wrong connection.
If the 24V power supply is also used to supply power to other units, it should be checked carefully to ensure that the 24V feed is safe
and meets the relevant safety standards, such as the SELV standard.
Other Precautions:
The panel should be brought to ambient temperature before installation, and if there is condensation,
ensure that it is dry before connecting the power supply.
When connecting the cables, follow the specified sequence of operation. After completing the installation,
carefully remove the film from the panel display to prevent static electricity from damaging the panel.
Mode switch operation:
The four mode switches on the operation panel must be in the OFF position when in use and should not be touched by unqualified personnel.
To switch modes, disconnect the power supply, set the switches and then reconnect the power supply.
Different mode switch combinations have different functions, such as system recovery, image loading, service menu, etc.
Improper operation may result in data loss or equipment failure.

- ABB
- General Electric
- EMERSON
- Honeywell
- HIMA
- ALSTOM
- Rolls-Royce
- MOTOROLA
- Rockwell
- Siemens
- Woodward
- YOKOGAWA
- FOXBORO
- KOLLMORGEN
- MOOG
- KB
- YAMAHA
- BENDER
- TEKTRONIX
- Westinghouse
- AMAT
- AB
- XYCOM
- Yaskawa
- B&R
- Schneider
- Kongsberg
- NI
- WATLOW
- ProSoft
- SEW
- ADVANCED
- Reliance
- TRICONEX
- METSO
- MAN
- Advantest
- STUDER
- KONGSBERG
- DANAHER MOTION
- Bently
- Galil
- EATON
- MOLEX
- Triconex
- DEIF
- B&W
- ZYGO
- Aerotech
- DANFOSS
- Beijer
- Moxa
- Rexroth
- Johnson
- WAGO
- TOSHIBA
- BMCM
- SMC
- HITACHI
- HIRSCHMANN
- Application field
- XP POWER
- CTI
- TRICON
- STOBER
- Thinklogical
- Horner Automation
- Meggitt
- Fanuc
- Baldor


