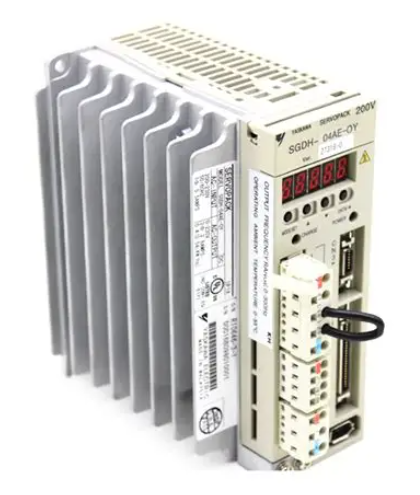
ABB Conductivity Analyzer Application Guide
The alarm function is powerful, and each alarm can be independently set to fail safe or non fail safe mode, equipped with adjustable delay time and lag interval, effectively preventing false alarms caused by process noise or instantaneous fluctuations.
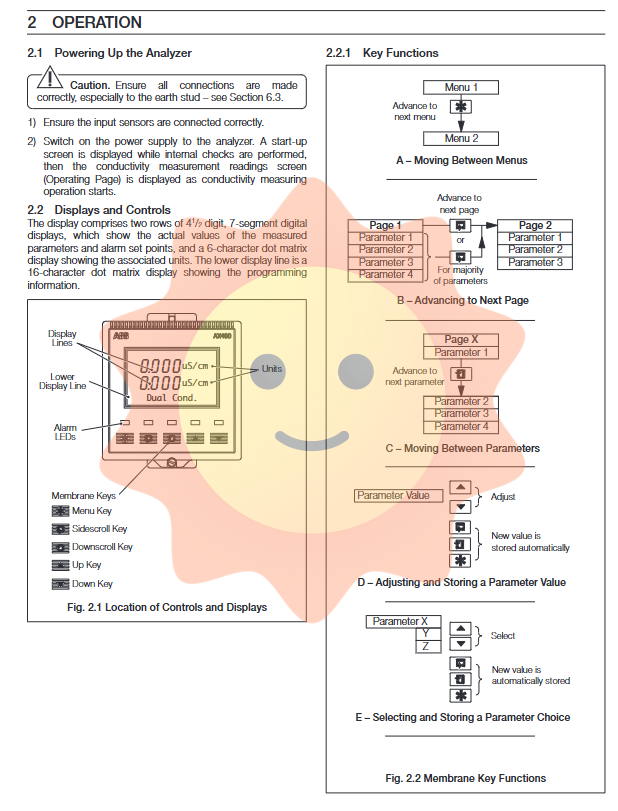
Key points for installation, calibration, and maintenance
1. Installation specifications and EMC considerations
Correct installation is the foundation for ensuring measurement accuracy and long-term stability.
Location selection: It should be installed in a location that is free from excessive vibration, avoids harmful vapors or droplets, and is easy to observe. The cable length between the sensor and analyzer needs to be limited according to the conductivity cell constant (K) (≤ 50m when K<0.1, ≤ 100m when K ≥ 0.1).
Wiring and grounding: Protective grounding (PE) is crucial and must be reliably connected to the grounding bolts of the enclosure to ensure personal safety, suppress radio frequency interference (RFI), and ensure the normal operation of the power filter. The metal braided layer of the conductivity pool cable is prohibited from grounding, and it should be cut short to the insulation layer at the end of the conductivity pool.
Wiring isolation: Signal lines (conductivity pool, analog output) should be laid separately from power lines (power supply, relay), preferably in grounded metal tubes to minimize electromagnetic interference.
Relay protection: If the relay is used to switch loads, arc extinguishing elements (RC absorbers for AC and freewheeling diodes for DC) must be connected at both ends of the contacts to prevent contact erosion and RFI interference with the normal operation of the analyzer.
2. Calibration and fault diagnosis
The analyzer undergoes precise calibration before leaving the factory, using high stability components and an analog-to-digital conversion chip with self compensation function, so regular calibration is usually not required. Calibration is mainly carried out when replacing the input board or when there is suspicion that the calibration data has been tampered with.
Calibration method: Simulate the resistance of the conductivity cell and temperature sensor by connecting them to a precision resistance box. Follow the "Factory Settings" menu to complete the calibration of the sensor zero point, span, and internal reference voltage in sequence.
Troubleshooting: The instrument provides clear error information (such as "A: FAULTRA Pt100"). If there is no response during measurement, first check if the conductivity cell is clean and if the parameter settings are correct. It is possible to quickly determine whether the fault point is located in the analyzer, cable, or conductivity cell itself by disconnecting the sensor and directly connecting it to the analog input of the resistance box. The method for checking temperature input is similar.
Summary of Technical Specifications
Measurement range: 0-0.5 to 0-10000 μ S/cm (depending on the conductivity cell constant K value).
Measurement unit: Supports μ S/cm, mS/cm, M Ω· cm, and TDS (conversion coefficient input required).
Accuracy: better than ± 1% of the reading.
Temperature compensation range: -10 to 150 ° C.
Display: Dual row backlit LCD digital tube and dot matrix character display.
Analog output: standard 2 channels, optional extension to 4 channels; 0/4-20mA, Isolated output with an accuracy of ± 0.25% FSD.
Environmental rating: Complies with EN 61326 (industrial environment) EMC standards, with a protection level typically NEMA 4X/IP66.
Power supply: usually AC or DC low voltage power supply.
- ABB
- General Electric
- EMERSON
- Honeywell
- HIMA
- ALSTOM
- Rolls-Royce
- MOTOROLA
- Rockwell
- Siemens
- Woodward
- YOKOGAWA
- FOXBORO
- KOLLMORGEN
- MOOG
- KB
- YAMAHA
- BENDER
- TEKTRONIX
- Westinghouse
- AMAT
- AB
- XYCOM
- Yaskawa
- B&R
- Schneider
- Kongsberg
- NI
- WATLOW
- ProSoft
- SEW
- ADVANCED
- Reliance
- TRICONEX
- METSO
- MAN
- Advantest
- STUDER
- KONGSBERG
- DANAHER MOTION
- Bently
- Galil
- EATON
- MOLEX
- DEIF
- B&W
- ZYGO
- Aerotech
- DANFOSS
- Beijer
- Moxa
- Rexroth
- Johnson
- WAGO
- TOSHIBA
- BMCM
- SMC
- HITACHI
- HIRSCHMANN
- Application field
- XP POWER
- CTI
- TRICON
- STOBER
- Thinklogical
- Horner Automation
- Meggitt
- Fanuc
- Baldor
- SHINKAWA
- Other Brands
- UniOP
- KUKA
- Iba


