
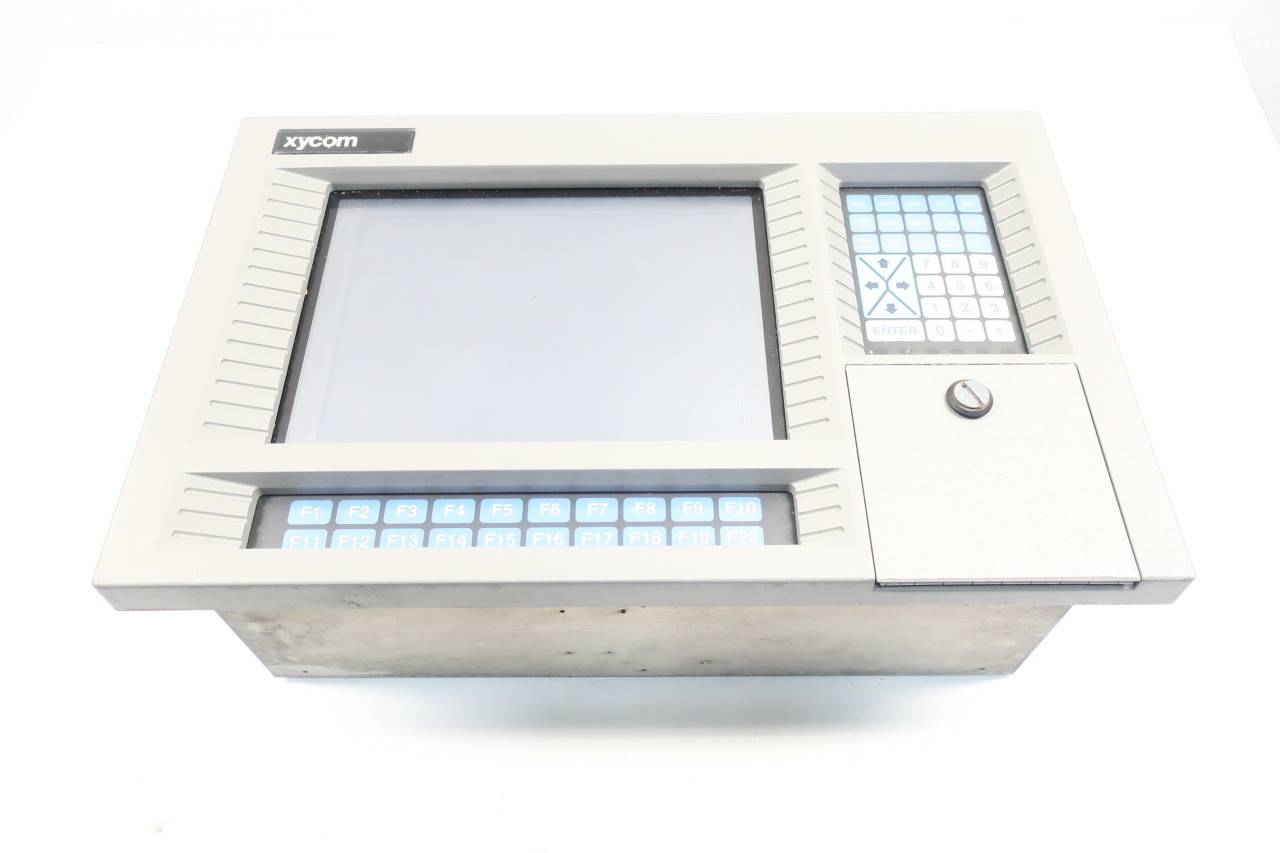
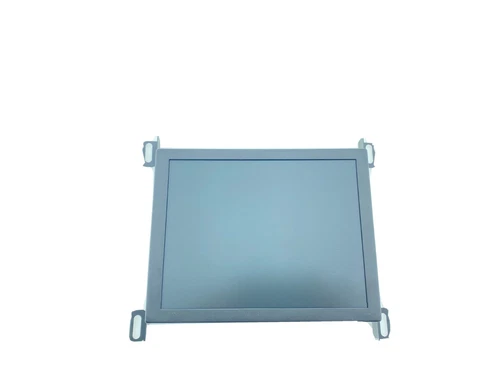
Xycom 4850 LCD monitor upgrade with cable kit 12 inches
Xycom 4850 LCD monitor upgrade with cable kit 12 inches
Introduction
The Xycom 4850, with its original display technology, may be showing signs of age in today's digital environment. Upgrading to a 12 - inch LCD monitor can bring about a significant transformation in terms of visual experience, energy efficiency, and overall performance. The inclusion of a cable kit in the upgrade process simplifies the installation, ensuring seamless connectivity between the new monitor and existing systems.
Reasons for Upgrading to an LCD Monitor
1. Power Efficiency
Older monitors, like the original display on the Xycom 4850, often consume a substantial amount of power. LCD monitors, on the other hand, are designed with energy - saving technologies. A 12 - inch LCD monitor typically consumes far less power, perhaps in the range of 15 - 30 Watts, compared to the potentially higher power draw of the original display. This reduction in power consumption not only helps in cutting down electricity bills but also contributes to a more sustainable and eco - friendly operation, especially in facilities with multiple monitors running continuously.
2. Enhanced Visual Quality
Resolution: Modern 12 - inch LCD monitors offer higher resolutions than older display technologies. For example, a common resolution for a 12 - inch LCD could be 1920x1080 (Full HD), which provides a much sharper and more detailed image compared to the lower - resolution displays that might be on the Xycom 4850. This is crucial for applications where clear visuals are essential, such as in industrial control rooms where operators need to accurately read data and monitor processes.
Color Accuracy and Contrast: LCD monitors are known for their improved color accuracy and contrast ratios. They can display a wider range of colors, making the visuals more vivid and true - to - life. The contrast ratio, which determines the difference between the darkest blacks and the brightest whites, is often much higher in LCDs. A good 12 - inch LCD might have a contrast ratio of 1000:1 or even higher in some advanced models, resulting in more distinguishable details in both light and dark areas of the screen.
Flicker - Free Display: Unlike some older display technologies that suffer from flickering, especially at lower refresh rates, LCD monitors refresh the entire image at once. This means that even at standard refresh rates like 60Hz, the display remains stable and flicker - free, reducing eye strain for users who spend long hours in front of the monitor.
3. Longer Lifespan
The components in an LCD monitor are generally more durable and have a longer lifespan compared to those in older - style monitors. LCD panels can last up to 50,000 hours or more, depending on the quality and usage conditions. This extended lifespan reduces the frequency of monitor replacements, leading to lower maintenance costs over time. In industrial or commercial settings where the Xycom 4850 is used, this reliability and long - term performance are highly desirable.
Components of the Upgrade Kit
1. The 12 - inch LCD Panel
Panel Technology: The LCD panel in the upgrade kit is likely to be an IPS (In - Plane Switching) or VA (Vertical Alignment) panel. IPS panels are renowned for their wide viewing angles, ensuring that the image remains consistent and clear from different perspectives. VA panels, on the other hand, offer excellent contrast ratios, making blacks appear deeper and more pronounced. Both types of panels can significantly enhance the visual experience compared to the original display on the Xycom 4850.
Build Quality: The panel is constructed with high - quality materials to ensure durability. It is designed to withstand the rigors of industrial or commercial use, such as vibrations in factory environments or frequent handling in certain workplaces. The edges of the panel are likely to be well - sealed to prevent dust and moisture ingress, which could affect the performance of the display over time.
2. Cable Kit
Video Cables: The cable kit should include a high - quality video cable, such as an HDMI (High - Definition Multimedia Interface) or DisplayPort cable. HDMI cables are widely used and support high - resolution video transmission, along with audio in some cases. A DisplayPort cable, on the other hand, is known for its ability to handle high - bandwidth signals, making it suitable for high - resolution and high - refresh - rate displays. The length of the cable should be sufficient to comfortably connect the new LCD monitor to the Xycom 4850's video output port, typically ranging from 1.5 to 3 meters.
Power Cable: A dedicated power cable is included to supply power to the new LCD monitor. The power cable is designed to be compatible with the monitor's power input requirements and should meet safety standards. It may have features such as proper insulation to prevent electrical hazards and a secure connector to ensure a stable power connection.
Installation Process
1. Preparation
Power Down and Disconnect: Before starting the upgrade, ensure that the Xycom 4850 is powered off and disconnected from all power sources and any connected devices. This includes unplugging the power cord from the wall outlet and disconnecting any video, audio, or other cables that are attached to the monitor.
Gather Tools: You may need a few basic tools for the installation, such as a screwdriver (if there are screws to remove or attach during the process), and a soft cloth to clean the surfaces of the monitor and the Xycom 4850 before installation.
2. Removing the Old Display
Unmounting: If the original display on the Xycom 4850 is mounted, carefully remove the mounting brackets or screws that hold it in place. Be cautious when handling the old display as it may be heavy or fragile. Some displays may be held in place by clips or latches, in which case you need to gently release these to remove the display.
Disconnecting Cables: Once the display is unmounted, disconnect all the cables that are attached to it. This includes the video cable, power cable, and any other auxiliary cables. Make sure to label the cables or take note of their connections to simplify the re - connection process later.
3. Installing the New LCD Monitor
Mounting the LCD Panel: Use the provided mounting hardware in the upgrade kit to attach the 12 - inch LCD panel to the Xycom 4850. The mounting hardware should be designed to fit the Xycom 4850's mounting points or enclosure. Secure the LCD panel firmly using the screws or brackets provided, ensuring that it is level and stable.
Connecting the Cables: Connect the video cable from the cable kit to the video output port on the Xycom 4850 and the corresponding input port on the new LCD monitor. Make sure the connection is secure. Then, connect the power cable to the LCD monitor and plug it into a power outlet. If there are any additional cables, such as audio cables (if applicable), connect them as well according to the instructions.
4. Power - On and Configuration
Power - On: After all the connections are made, power on the Xycom 4850 and the new LCD monitor. The monitor should automatically detect the video signal from the Xycom 4850. If it doesn't, check the cable connections and make sure the monitor is set to the correct input source (using the monitor's on - screen menu).
Configuration: Adjust the display settings of the new LCD monitor according to your preferences and the requirements of the applications running on the Xycom 4850. This may include setting the resolution to the native resolution of the LCD monitor for the best image quality, adjusting the brightness, contrast, and color settings to suit the viewing environment, and enabling any additional features such as HDR (High - Dynamic Range) if available on the monitor.
Post - Upgrade Considerations
1. Compatibility
Although the upgrade kit is designed to be compatible with the Xycom 4850, there may be rare cases where compatibility issues arise. For example, some older systems may not fully support the higher resolutions or advanced features of the new LCD monitor. In such cases, you may need to update the graphics drivers or firmware of the Xycom 4850. If the problem persists, contact the manufacturer of the upgrade kit or Xycom for technical support.
2. Calibration
To get the best visual performance from the new LCD monitor, it may be necessary to calibrate the display. This involves adjusting the color, brightness, contrast, and other settings to match the specific requirements of the applications or the viewing environment. There are various calibration tools available, both software - based and hardware - based. Software - based calibration tools can be downloaded and used to adjust the settings, while hardware - based calibration devices, such as colorimeters, can provide more accurate calibration results.
3. Maintenance
Regular maintenance of the new LCD monitor can help prolong its lifespan and ensure optimal performance. This includes keeping the screen clean by using a soft, lint - free cloth to wipe away dust and smudges. Avoid using harsh chemicals or abrasive cleaners as they can damage the screen. Also, periodically check the cable connections to ensure they are secure and free from any signs of wear or damage.
- OMRON
- ABB
- General Electric
- EMERSON
- Honeywell
- HIMA
- ALSTOM
- Rolls-Royce
- MOTOROLA
- Rockwell
- Siemens
- Woodward
- YOKOGAWA
- FOXBORO
- KOLLMORGEN
- MOOG
- KB
- YAMAHA
- BENDER
- TEKTRONIX
- Westinghouse
- AMAT
- AB
- XYCOM
- Yaskawa
- B&R
- Schneider
- KONGSBERG
- NI
- WATLOW
- ProSoft
- SEW
- ADVANCED
- Reliance
- TRICONEX
- METSO
- MAN
- Advantest
- STUDER
- DANAHER MOTION
- Bently
- Galil
- EATON
- MOLEX
- DEIF
- B&W
- ZYGO
- Aerotech
- DANFOSS
- Beijer
- Moxa
- Rexroth
- Johnson
- WAGO
- TOSHIBA
- BMCM
- SMC
- HITACHI
- HIRSCHMANN
- Application field
- XP POWER
- CTI
- TRICON
- STOBER
- Thinklogical
- Horner Automation
- Meggitt
- Fanuc
- Baldor
- SHINKAWA
- Other Brands
- UniOP
- KUKA
- Iba
- Beckhoff
- ADLINK
-
 Micro Innovation GF1-10TVA-100 Touch Panel
 -
 Micro Innovation GSO-57EQD-000 Operator Panel
 -
 Micro Innovation XN-2AI-U Analog Input Module
 -
 Micro Innovation CAN-4AI/UI Analog Input Module
 -
 Micro Innovation ZSB-1.5/8-S/S/-/PE Base Terminal
 -
Micro Innovation AG XVH-340-57CAN-1-10 HMI Panel
-
 Micro Innovation GSO-57EQD-000 Micro Panel
 -
 Micro Innovation XN-2AI-PT/NI-2/3 Input Module
 -
 Micro Innovation AG GF0-57SQD-000 Display Panel
 -
 MICRO INNOVATION AG XN-16DI-24VDC-P Input Module
 -
 Micro Innovation XN-2AI-PT/NI-2/3 Input Module
 -
 Micro Innovation MC2-442-57CQB-1-2G Display Panel
 -
 Micro Innovation XN-16DO-24VDC-0.5A-P Module
 -
 Micro Design MC200PROFI Programmable Module
 -
Micro Innovation XV-252-57MPN-1-10 Micro Panel
-
 Micro Innovation CAN-4AI/UI Analog Input Module
 -
Micro Innovation GT1-MPI-A000 Panel
-
Micro Innovation MC2-440-10TVB-1-21 Display Panel
-
Micro Innovation XVS-430-57MPI-1-1S 6" HMI
-
Micro Innovation XV-442-57CQB-1-1AB Monitor
-
 Micro Innovation ZSB-1.5/8-S/S/-/PE Base Terminal
 -
Micro Design 895A Microfiche Reader
-
 MICRO INNOVATION XNE-8DI-24VDC-P Input Module 8550100794
 -
MICRO INNOVATION MICRO PANEL GF0-10CVD-002
-
 Micro Innovation XN-PLC-CANopen Controller 85 50 274124
 -
Micro Innovation Display Panel GS0-57E0D-000
-
MICRO INNOVATION CAN-32DI/P2X16 Input Module
-
MICRO INNOVATION XN-2DO-R-NO Relay Output Module
-
MICRO INNOVATION XNE-16DI-24VDC-P Input Module
-
Micro Innovation AG XN-2AI-U Analog Input Module
-
Micro Innovation XN-BR-24DC-D Power Supply
-
Micro Innovation MH2-342-57EIB-1-20 Panel
-
Micro Innovation XV-252-57MPN-1-10 Micro Panel
-
 Micro Innovation Display Card EIB2-TP
 -
 Micro Innovation XV-252-57MPN-1-10 6" HMI
 -
 Micro Innovation XN-B3T-SBC 16x DO Base Module
 -
Micro Innovation XVH-330-57MPI-1-10 Panel
-
Micro Innovation XN-BR-24VDC-D Power Module
-
 Micro Innovation EIB2-TP EIB2TP Module
 -
Micro Innovation GF0-10CVD-100 Touch Panel
-
MICRO INNOVATION XV-230-57CNN-1-10 HMI-PLC
-
MICRO INNOVATION XN-2DO-R-CO Relay Output Module
-
KMK MICRO INNOVATION GS2-90EMD-000 Micro Panel
-
 Micro Innovation XN-2AO-U Analog Output Module
 -
 Micro Innovation XN-1AO-I Analog Output Module
 -
 Micro Innovation CAN-32DI/P-2x16 Rack Module
 -
Eaton Micro Innovation MC2-440-10TVB-1-11 HMI
-
Micro Innovation AG CAN Bridge 8551224177
-
 Micro Innovation XN-2AI-I Analog Input Module Set
 -
Micro Innovation XN-4DI-24VDC-P Input Module
-
 Micro Innovation Winbloc CAN-16DO/0.5A-PK Module
 -
Micro Innovation Micro Panel GFO-10SVD-002 HMI
-
 Micro Innovation CAN-24DI/8DO/0.5A-PK Module
 -
 Micro Innovation DP-24DI/8DO/0.5A-PK I/O Module
 -
 Weidmuller Micro Innovation CAN-BRIDGE ZSFA 1,5R
 -
Micro Innovation CAN-3AI/1AO-UI Profibus Module
-
 Micro Innovation PDP-TP Profibus DP Module
 -
Micro Innovation CAN-3AI/1AO-UI Analog Module
-
 Micro Innovation MC2-430-12TSB-10 HMI Panel
 -
Micro Innovation XNE-8DO-24VDC-0.5A-P I/O Module
-
MICRO INNOVATION AG WINBLOC CAN-32DI/P-2x16 85 51 224182
-
 MICRO INNOVATION AG WINBLOC CAN-4AO/UI 85 51 224195
 -
Micro Innovation Xv-252-57cnn-1-10 HMI Panel
-
Micro Innovation XN Basis XN-S4T-SBBS-CJ 225200
-
Micro Innovation GF1-10TVD-100 Micro Panel
-
Micro Innovation XN-B3T-SBC 16-Fold DO Base Module
-
MICRO INNOVATION AG WINBLOC CAN-3AI/1AO-UI 85 51 224192
-
KMK Micro Innovation GS2-90EMD-000 Micro Panel
-
Micro Innovation MC2-430-10TVB-1-10 PanelView Terminal 24VDC
-
 Micro Innovation XNE-8DO-24VDC-0.5A-P I/O Module 8550100795
 -
MICRO INNOVATION GF1-10TVB-100 Touch Panel
-
MICRO INNOVATION AG WINBLOC CAN-4AI/UI Analog Input Module
-
MICRO INNOVATION AG WINBLOC CAN-32DO/0.5A-P-2x16 Output Module
-
MICRO INNOVATION AG CAN-32DI/P-2X16 8551224182 Input Module
-
 MICRO INNOVATION MK2-230/232-57 Circuit Board 85 28 200000
 -
 MICRO INNOVATION CAN-BRIDGE 8551224177 CAN Bridge
 -
Micro Innovation MC2-430-10TVB-1-10 Panel 24VDC
-
MICRO INNOVATION MC2-432-57CQB-1-10 HMI Panel
-
MICRO INNOVATION AG CAN-BRIDGE 85 51 224177 CAN Bridge
-
MICRO INNOVATION CAN-4AI/UI Analog Input Module
-
MICRO INNOVATION CAN-32DI/P-2X16 Input Module
-
 SIGMATEK MDD111 09-404-111 Drive Module
 -
 SIGMATEK DVI021 Display Interface Module
 -
 SIGMATEK 00-450-024 C-IPC Processor
 -
 SIGMATEK MDD-111 MDD111 Drive Module
 -
 SIGMATEK ICA011 20-102-011 Interface Module
 -
 SIGMATEK 01-250-010-D NC4Kompakt Control Module
 -
 SIGMATEK CRIF081 12-751-081 Interface Module
 -
 SIGMATEK S1026-8AF61-R4E-Z57 Drive Module
 -
 SIGMATEK 9305.081.02 9227.082.00 Control Module
 -
 Sigma Tek 5000B-36 Attitude Indicator
 -
 SIGMATEK CEZ201 12-051-201-O Counter Module
 -
 SIGMATEK DPS001 Power Supply Module
 -
 SIGMATEK 994 395 01z Via Interface Module
 -
 SIGMATEK PC411-K 01-310-411-K Industrial PC
 -
 SIGMATEK 9816.324.00 Demag NC4 Keyboard
 -
 SIGMATEK ET261 90010C-71 Operator Terminal
 -
 SIGMATEK DDI 164 05-006-164 Input Module
 -
 SIGMATEK CCP 082 C-DIAS Processor Module
 -
SIGMATEK CEZ201 12-051-201-O PLC Module
-
SIGMATEK MDD 1111 06178867 Drive Module
-
SIGMATEK S1 073-6AC61-RE-Y08-Z Drive Module
-
SIGMATEK MDD 111 Drive Module MDD111
-
 SIGMATEK CSDI161 Safety Module 12-891-161
 -
SIGMATEK C-IPC Processor 01-450-024
-
 SIGMATEK DIAS DAM122 Analog Mixing Module
 -
Sigma Tek 5000B-36 Attitude Gyro Indicator
-
 SIGMATEK TMS012 Motherboard Module 05-250-012-T
 -
 SIGMATEK CCP-531 PLC Module
 -
SIGMATEK DIAS DNC4 I/O Module 05-250-011
-
 SIGMATEK AI088 Analog Input Module
 -
 SIGMATEK CEZ201 Counter Module
 -
SIGMATEK CIC011 Industrial Computer Module
-
 SIGMATEK MDM021 Motor Drive Module
 -
 SIGMATEK DTO163 Digital Output Module
 -
SIGMA-TEK 5000B-36 Attitude Gyro
-
SIGMATEK DM161 Digital Input Module
-
SIGMATEK CCP-531 PLC Control Panel
-
 SIGMATEK HZS773 Touch Terminal Operator Panel
 -
SIGMATEK MDP101 3 KVA 45-65Hz Driver
-
 SIGMATEK ETV1251 Touch Panel 12-230-1251
 -
SIGMATEK CIO021 Safety Module 12-013-021
-
Sigma Tek 4000H-5 Directional Gyro
-
 SIGMATEK TAE531 I/O Module 01-240-531
 -
 SIGMATEK DAI081 Input Module 05-009-081
 -
 SIGMATEK DCP640 Drive Control Module
 -
 SIGMATEK DCP643 Slides Module A6-29
 -
SIGMATEK SCP011 Safety Module 20-890-011


