
Xycom 4850 LCD monitor 12 inch upgrade with cable kit
Xycom 4850 LCD monitor 12 inch upgrade with cable kit
In the field of industrial automation and equipment operation monitoring, the performance of display devices directly affects the operator's perception and control efficiency of equipment status. The 12 inch CRT monitor originally equipped on the Xycom 4850, although played an important role in the past, gradually exposed many drawbacks with the continuous advancement of technology. CRT monitors have problems such as high power consumption, large size, limited image clarity, and susceptibility to image flickering, which not only affect the visual experience of operators, but long-term use may also lead to eye fatigue, thereby affecting work efficiency. Moreover, CRT technology is becoming increasingly outdated, the supply of related components is gradually decreasing, and the difficulty of equipment maintenance and repair is constantly increasing.
Upgrade kit composition
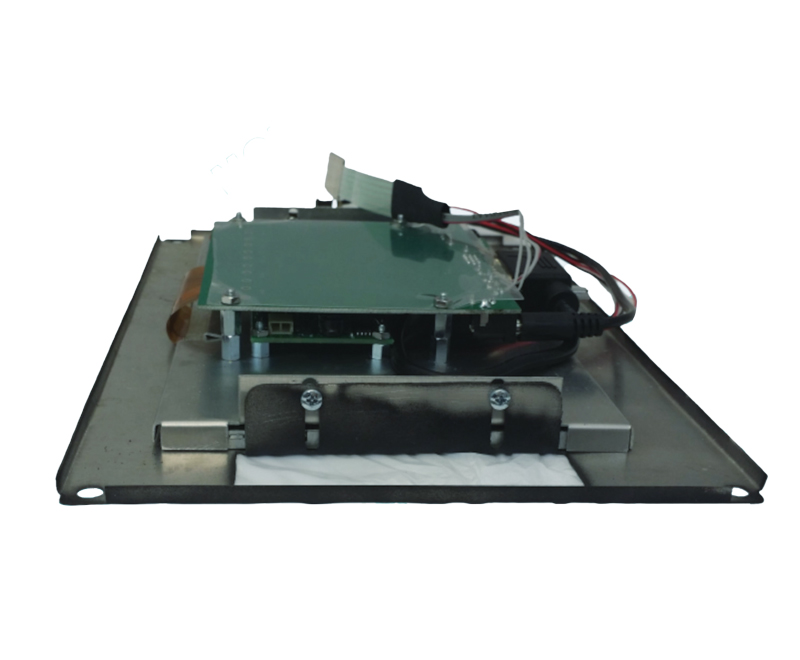
(1) 10.4-inch LCD screen
The core component in the upgrade kit is a 10.4-inch LCD screen. This screen adopts advanced LCD display technology, which has higher resolution compared to traditional 12 inch CRT screens and can present clearer and more delicate images. Whether it is complex equipment operation parameter charts or fine production process monitoring screens, they can be clearly displayed, allowing operators to obtain information more accurately. At the same time, the color reproduction of LCD screens is better, which can present richer and more realistic colors, helping operators to more intuitively judge the device status. In addition, the screen also has excellent viewing angles, and when viewed from different directions, the clarity and color of the image will not show significant distortion, making it convenient for multiple people to view device information simultaneously.
(2) MK018 cables and other accessories
To ensure seamless connection between the upgraded LCD screen and the existing Xycom 4850 system, the upgrade kit is equipped with MK018 cable. This type of cable is specially designed to have good electrical performance and stability, capable of efficiently transmitting image signals and control signals, ensuring the stability and smoothness of screen display. At the same time, the kit also includes a series of other necessary accessories, such as mounting brackets, fixing screws, etc. The design of the installation bracket fully considers the compatibility with the original CRT display installation position, which can easily and quickly install the LCD screen on the original equipment frame without the need for large-scale structural modifications, greatly reducing installation difficulty and cost. The fixing screws and other accessories are made of high-quality materials to ensure that the installed screen is firm and reliable, and there will be no looseness or displacement during the operation of the equipment.
(3) Installation Guide
Considering the actual needs of users during the upgrade process, a detailed installation guide is included in the upgrade kit. The installation guide guides users step by step through the entire process from removing the original CRT monitor to installing a new LCD screen and related accessories in the form of illustrations and text. For each installation step, there are clear text instructions and corresponding image examples, so even non professional technicians can smoothly complete the upgrade installation work according to the guide. The installation guide also provides common problem answers and troubleshooting methods to help users solve problems in a timely manner, ensuring the smooth progress of the upgrade work.
Detailed explanation of installation process
(1) Dismantle the original CRT monitor
Before starting to install the upgrade kit, it is necessary to ensure that the equipment is powered off to ensure the personal safety of the operators. Then, carefully remove the original 12 inch CRT monitor according to the installation instructions. Usually, it is necessary to first unscrew the screws that secure the monitor, which are usually distributed on the frame or back of the monitor. When removing screws, be careful to store them properly to avoid loss. Next, carefully unplug various cables connected to the CRT monitor, including video signal cables, power cords, etc. When plugging and unplugging cables, excessive force should be avoided to prevent damage to cable interfaces or internal circuits of equipment. The removed CRT monitor should be properly placed for future processing.
(2) Install a new LCD screen and accessories
Installation bracket fixation: Remove the installation bracket from the upgrade kit and install it in the installation position of the original CRT monitor according to the instructions in the installation guide. Use the matching fixing screws to securely fix the bracket to the equipment frame, ensuring that the bracket is installed firmly and will not shake. When fixing screws, it is important to use appropriate tools and tighten them to the specified torque to avoid instability of the bracket or damage to the equipment frame caused by loose screws.
- OMRON
- ABB
- General Electric
- EMERSON
- Honeywell
- HIMA
- ALSTOM
- Rolls-Royce
- MOTOROLA
- Rockwell
- Siemens
- Woodward
- YOKOGAWA
- FOXBORO
- KOLLMORGEN
- MOOG
- KB
- YAMAHA
- BENDER
- TEKTRONIX
- Westinghouse
- AMAT
- AB
- XYCOM
- Yaskawa
- B&R
- Schneider
- KONGSBERG
- NI
- WATLOW
- ProSoft
- SEW
- ADVANCED
- Reliance
- TRICONEX
- METSO
- MAN
- Advantest
- STUDER
- DANAHER MOTION
- Bently
- Galil
- EATON
- MOLEX
- DEIF
- B&W
- ZYGO
- Aerotech
- DANFOSS
- Beijer
- Moxa
- Rexroth
- Johnson
- WAGO
- TOSHIBA
- BMCM
- SMC
- HITACHI
- HIRSCHMANN
- Application field
- XP POWER
- CTI
- TRICON
- STOBER
- Thinklogical
- Horner Automation
- Meggitt
- Fanuc
- Baldor
- SHINKAWA
- Other Brands
- UniOP
- KUKA
- Iba
- Beckhoff
-
 Basler BE1-59N A5EE1KC0N0F Ground Fault Relay
 -
 Basler BE1-79A Reclosing Relay
 -
 Basler BE1-32R E1EA1OA0N0F Reverse Power Relay
 -
 Basler DCQA-103 DCQC104-1 CMX-7D Circuit Board
 -
 Basler SSR125-12 Static Regulator 918500102
 -
 Basler 90 17709 112 Regulator Control Board
 -
 Basler AVC63-4 AVC634 Voltage Regulator
 -
 Basler 9 1049 04 100 PC Board Control Module
 -
 Basler SR4A-2B03B3A Static Voltage Regulator
 -
 Basler SR8A-2B15B3A Static Voltage Regulator
 -
 Basler KR7FFX Static Regulator 840V
 -
 Basler EL200-7 Voltage Regulator 90-660VAC 7A
 -
 Basler PRP210-1 Reverse Power Relay 9056300102
 -
 Basler SSR 63-12 Static Regulator 600VAC
 -
 Basler 9289901106 Digital Board
 -
Basler DECS100 Voltage Regulator DECS100A01
-
 Basler Electric CEM-2020 Contact Expansion Module
 -
 Basler Electric BE3-25-1 C1 N4 Synchronizing Check Relay
 -
 Basler Electric ACA2000-50GM GigE Camera 2MP 50fps
 -
 Basler Electric ACA2240-20GMSYM GigE Camera Sony IMX264
 -
 Basler BE1-50G Ground Overcurrent Relay
 -
 Basler PRS250 Veri-Sync Relay
 -
 Basler MOC2199 Output Module
 -
 Basler UFOV 260A Underfrequency Overvoltage Module
 -
 Basler BE-15482-001 Control Module
 -
 Basler LSP4-7 Protective Relay
 -
 Basler SCP 250-G-60 VAR Power Factor Controller
 -
Basler BE146N Negative Sequence Overcurrent Relay
-
Basler APR63-5 Automatic Voltage Regulator
-
Basler 9507900107 SR8A Retrofit Voltage Regulator
-
Basler BE1-320 Directional Power Relay
-
 Basler KR7F Voltage Regulator 9116200100
 -
Basler UFOV 260A Overvoltage Protective Module
-
 Basler AEC63-7 Analog Excitation Controller
 -
Basler 9992D90G01 Control Module
-
 Basler 6966D22G01 Control Board
 -
Basler 6965D40G01 Control Board
-
 Basler BE1-50/51M-104 Overcurrent Relay
 -
 Basler BE1-BPR Programmable Breaker Relay
 -
 BASLER Electric SSR 125-9 1256 00 102 Static Voltage Regulator
 -
 Basler Electric MVC 112 Manual Voltage Control
 -
 Basler Electric 9321000102 Control Module
 -
 Basler Electric RA-70-MDCT7 Rectifier Assembly
 -
 Basler Electric ACA1300-60GM GigE Camera
 -
 Basler Electric 6427C85G01 Interface Board
 -
Basler Electric 6965D05G01 Control Board
-
Basler Electric ACA2500-14UC Current Transducer
-
 Basler Electric 9170206111 Protective Relay
 -
 Basler Electric BE1-11-G6D1M1J1P0E000 Protection Relay
 -
Basler Electric BE1-50/51B-107 Overcurrent Relay
-
 Basler 9121000106 Voltage Controller
 -
 Basler B3E-E1P-A0N0F Solid State Protective Relay
 -
 Basler 9121000106 Manual Voltage Control
 -
Basler PRP320 Motor Pull-out Relay
-
 Basler SSE-N 250-9KW Shunt Exciter Regulator
 -
 Basler BE1-50-51B-107 Overcurrent Relay
 -
 BASLER ELECTRIC MVC 108 MANUAL VOLTAGE CONTROL MODULE 9 0370 00 102
 -
Basler BE1-59N-A7E-D1J-D0N0F Ground Overvoltage Relay
-
Basler BE1-46N-G1E-B8P-B0N0F Negative Sequence Overcurrent Relay
-
Basler BE1-951 Overcurrent Protection System
-
 Basler Electric MOC2199 Motor Operated Potentiometer
 -
 Basler Electric BE1-60 Voltage Balance Solid State Relay B1FA1C1M1F
 -
 Basler Electric BE1-67N Directional Overcurrent Relay
 -
Basler Electric PIA2400-17GM Interface Module
-
 Basler Electric V6RAB Rectifier Module
 -
Basler Electric BE1-32R Reverse Power Relay B2E E1R A0N1F
-
Basler Electric IFM-150 Firing Circuit Chassis 120V AC
-
 Basler Electric IFM-102 Firing Circuit Chassis 120V AC
 -
 Basler Electric 9170206111 NSNP Control Module
 -
Basler Electric SSR 63-12 Static Voltage Regulator
-
 Basler UFOV 260A Overvoltage Protective Module
 -
Basler SCA1300-32GM CCD Camera Lens Enclosure
-
 Basler BA1-27 Under Voltage Relay
 -
Basler 149D866G06 Control Board
-
 Basler 9072300130 Power Supply Module
 -
Basler CBS 305 Current Boost System
-
 Basler BE1-60 Voltage Balance Relay
 -
 Basler Electric CBS 212 Current Boost System Sensing 120/240VAC 50/60Hz 10VA
 -
 Basler MVC-300 Manual Voltage Control Unit
 -
Basler SSR125-12 Static Voltage Regulator 918500102
-
Basler SR32A2B05B3E Static Voltage Regulator
-
Basler Electric BE1-59N Ground Fault Overvoltage Relay
-
 Basler Electric 9110000113 Excitation Module
 -
Basler Electric 90-72300-114 Control Accessory
-
Basler Electric PRS-250 Protection Relay System
-
Basler Electric BE1-50/51M-109 Overcurrent Relay
-
 Basler Electric SR4A1B10B3E Static Voltage Regulator
 -
 Basler Electric CBS 212 Current Boost System
 -
Basler Electric SR32A2B05B3E Static Voltage Regulator
-
Basler Electric MOC2207 Motor Operated Potentiometer
-
 Basler Electric SR4A1B05A3E Static Voltage Regulator
 -
Basler Electric BE1-32R Power Relay B2EE1PA0N1F
-
Basler BEI-81 Underfrequency Relay
-
Basler CBS 212A Current Boost System
-
Basler SSR 63-12 Static Voltage Regulator
-
 Basler DGC-2020 Digital Genset Controller
 -
Basler BE1-32 Reverse Power Relay
-
 Basler BE1-50/51B-207 Overcurrent Relay
 -
Basler BE1-951 Overcurrent Protection System
-
 Basler 9073800-103 Power Supply
 -
Basler SCA1300-32FC CCD Camera
-
Basler 9073800-103 Power Supply
-
Basler SCA1300-32FC CCD Camera
-
 Basler L304KC Protective Relay
 -
 Basler BE3-25-1S1N4 Time Overcurrent Relay
 -
Basler 9032300113 Excitation Support System
-
Basler BE1-59N Ground Overvoltage Relay
-
Basler MVC-300 Manual Voltage Control Unit
-
Basler MOC2102 Potentiometer
-
 Basler BE1-87G Generator Differential Relay
 -
 Basler Electric DECS-200 Digital Excitation Control System
 -
Basler Electric DECS 125-15-B2C5 Digital Excitation System
-
 Basler Electric PLA2400-12GM Power Supply
 -
 Basler Electric BE1-50/51B-235 Overcurrent Relay
 -
Basler Electric BE1-27/59 Undervoltage Overvoltage Relay
-
Basler Electric CEM-2020 Contact Expansion Module
-
Basler Electric BE1-32R Solid State Power Relay
-
 Basler Electric BE1-700 Digital Generator Management Relay
 -
Basler Electric BE1-59N Ground Fault Overvoltage Relay
-
Basler Electric BE10493002 Protection Module
-
 Basler Electric BEI-79A1AA5CA3M1F Digital Annunciator
 -
Basler Electric SSR 32-12 Static Voltage Regulator
-
Basler Electric BE1-CDS240 Current Differential System
-
Basler Electric BE1-67 Directional Overcurrent Relay
-
 Basler Electric 9121000106 DECS-100 Voltage Controller
 -
Basler Electric BEI-871 Interface Module
-
Basler Electric 8650C72 Exciter Control Module
-
Basler Electric RDP-110-S1 Generator Annunciator


