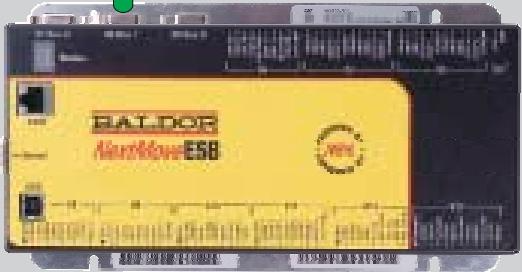
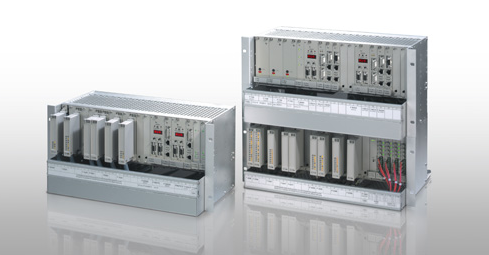
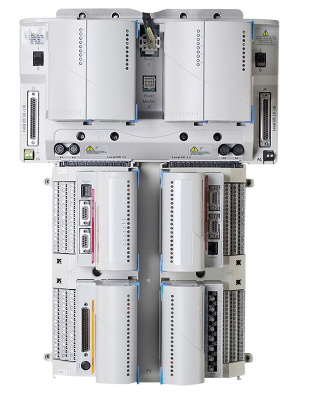
The ABB LDMTR-01 63940135F input/output The ABB 57619414 A 2/2 connector module is a key auxiliary component used for signal and power connection in ABB industrial automation systems, designed specifically for reliable wiring and signal transmission between industrial field equipment. This module features a "2/2" structure as its core feature (usually referring to a wiring configuration of 2 inputs and 2 outputs, or dual independent wiring units), with compact structure, stable connection, and strong anti-interference ability. It is widely applicable to ABB S800, AC500 and other series of automation control systems and is an important component for realizing signal bridges between sensors, actuators, I/O modules, and controllers.(I/O) module is a core peripheral device in ABB industrial automation control systems, designed specifically for signal acquisition and control instruction execution in industrial sites. This module, with its high reliability, strong anti-interference ability, and flexible adaptability, is widely used in complex industrial scenarios such as power, metallurgy, chemical, and manufacturing industries. It can achieve precise acquisition of on-site sensor signals and stable control of actuators, providing key signal transmission and conversion support for the efficient operation of automation systems.
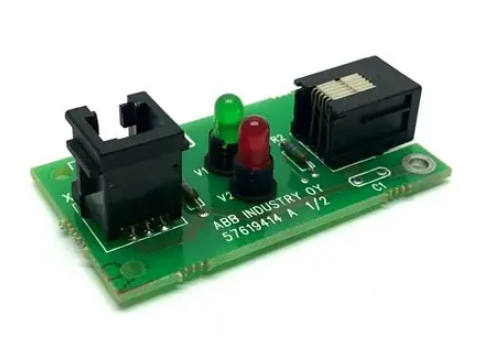
ABB 57619414 A 2/2 connector module
Basic overview of module
The ABB 57619414 A 2/2 connector module is a key auxiliary component used for signal and power connection in ABB industrial automation systems, designed specifically for reliable wiring and signal transmission between industrial field equipment. This module features a "2/2" structure as its core feature (usually referring to a wiring configuration of 2 inputs and 2 outputs, or dual independent wiring units), with compact structure, stable connection, and strong anti-interference ability. It is widely applicable to ABB S800, AC500 and other series of automation control systems and is an important component for realizing signal bridges between sensors, actuators, I/O modules, and controllers.
As a "joint" component of industrial wiring systems, this module strictly follows industrial grade design standards. The outer shell is made of flame-retardant insulation material, and the internal wiring terminals have anti loosening and anti-aging characteristics, which can adapt to high temperature, high humidity, and high dust industrial site environments, effectively reducing system failures caused by poor wiring, and improving the wiring efficiency and maintenance convenience of automation systems.
Core functions and roles
2.1 Signal and power conversion
The core function of the module is to achieve signal and power conversion between industrial field equipment and control systems. Its 2/2 structure can respectively connect 2 input signals (such as analog/digital signals from sensors) and 2 output signals (such as control signals from controllers to actuators), or achieve 2 independent power and signal combination and conversion. The scattered field wiring is centralized and collected at the module terminals, and then connected to the system main equipment (such as I/O modules) through standardized interfaces, simplifying the wiring link and avoiding line confusion.
2.2 Wiring protection and fixation
The module is equipped with high-strength wiring terminals, which are fastened with screws or crimped with springs (depending on the product specifications), and can firmly fix the wires (supporting single/multi strand hard wires and flexible wires) to prevent loose or detached wiring due to vibration or pulling. At the same time, the terminal is designed to prevent accidental insertion, avoiding the reverse connection of positive and negative poles or the wrong connection of signal lines, reducing the risk of wiring errors, and protecting subsequent equipment from damage.
2.3 Signal anti-interference optimization
The module reduces the impact of electromagnetic interference on transmission signals in industrial sites through reasonable internal circuit layout and shell shielding design. Some models are equipped with built-in signal filtering units, which can perform simple filtering processing on the analog signals passing through, suppress high-frequency interference, ensure the stability and accuracy of signal transmission, and provide reliable guarantee for accurate judgment and control of the control system.
2.4 Convenient operation and expansion
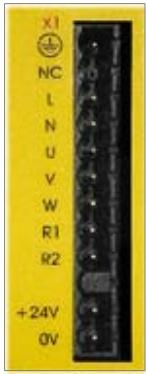
The module adopts standardized identification design, and the signal type, number and other information are clearly marked next to the terminals for easy identification and verification during wiring. During the system operation and maintenance phase, if sensors, actuators, or circuit faults need to be replaced, they can be directly operated at the module end without disassembling the main equipment wiring, greatly reducing maintenance time. At the same time, its modular structure supports combined installation with other connector modules and I/O modules, providing flexible wiring support for system expansion in the later stage.
Key technical parameters
Wiring configuration
Core structure
2/2 wiring structure, supporting independent wiring of 2 inputs and 2 outputs, or 2 sets of dual composite wiring
Terminal type
Phoenix terminal/spring terminal, supporting wire specifications of 0.5-2.5mm ² (single/multi strand flexible wire requires wiring ears)
wiring method
Screw tightening (torque 0.5-0.8N · m), contact resistance ≤ 5m Ω
Electrical performance
rated voltage
AC/DC 0-600V, Meets the requirements of industrial high and low voltage wiring
rated current
Each terminal has a rated current of 10A and a short-time withstand current of 20A (10s)
insulation performance
Insulation resistance ≥ 100M Ω (500V DC), withstand voltage 2500V AC (no breakdown for 1 minute)
Environment and Protection
working environment
Temperature -40 ℃~85 ℃, humidity 5%~95% (no condensation), suitable for harsh industrial environments
Protection level
Module body IP20, wiring area protection level IP20 (can reach IP30 with the installation of guide rails and cover plates)
Machinery and Materials
Installation method
Standard 35mm DIN rail installation, installation depth ≤ 60mm, suitable for dense installation
housing material
PA66 flame retardant material (UL94 V-0 grade), with fire-resistant and impact resistant properties
Installation and wiring specifications
4.1 Installation Requirements
-The module needs to be installed on a standard 35mm DIN rail, and the installation position should be adjacent to the main equipment such as I/O modules and controllers to shorten the wiring distance; Stay away from high-temperature heat sources (such as power resistors, heaters) and strong electromagnetic radiation sources (such as frequency converters).
-During intensive installation, a minimum 3mm heat dissipation gap should be maintained between modules to avoid shell aging caused by heat accumulation; If installed inside the control cabinet, it is necessary to ensure good ventilation inside the cabinet and install a cooling fan if necessary.
-During the installation process, gently push the module to the rail buckle lock to avoid violent pressing that may damage the module casing or internal terminals; After fixing, it is necessary to check whether the module is stable, without looseness or shaking.
4.2 Wiring specifications
-Before wiring, the power supply of the relevant equipment must be cut off, and a multimeter must be used to confirm that there is no residual voltage in the circuit to prevent electric shock or short circuit accidents; The wiring tool should use a screwdriver that matches the terminal specifications (it is recommended to use a PH2 cross screwdriver).
-The length of wire stripping should be controlled between 8-10mm to avoid short circuits caused by exposed bare wires due to excessive stripping, or poor contact caused by insufficient stripping; Multiple flexible cords need to be crimped with cold pressed terminals before being connected to the module, and direct insertion into the terminals is prohibited.
-Strictly follow the module surface labeling for wiring. Input signals (such as sensor wires) should be connected to the "IN" labeling terminal, and output signals (such as actuator wires) should be connected to the "OUT" labeling terminal. The positive and negative poles of the power supply should correspond to the "+" and "-" labels, and reverse wiring is not allowed.
-After the wiring is completed, gently pull the wire to confirm that it is firmly fixed and not loose; At the same time, organize the wiring and fix the wires along the guide rail to avoid entanglement or compression of module interfaces, which may affect subsequent maintenance.
Common faults and troubleshooting methods
Fault phenomenon
Possible reasons
troubleshooting method
Signal transmission interruption
1. Loose wiring or poor contact of wires; 2. Oxidation or dust accumulation inside the terminal; 3. Wire breakage
1. Tighten the terminal screws again and gently pull the wire to confirm firmness; 2. Disconnect the wire and polish the terminal contacts with fine sandpaper; 3. Measure the continuity of the wire with a multimeter and replace the broken wire
Terminal overheating and discoloration
1. Loose wiring leads to excessive contact resistance; 2. The load current exceeds the rated value of the terminal; 3. The wire specification is too small
1. After power off, tighten the terminals again and check the contact condition; 2. Check the load current and replace the connector module that is compatible with high current; 3. Replace the wires that meet the specifications (≥ 1.0mm ²)
Module shell damaged
1. Violent operation during installation; 2. External impact or compression; 3. High temperature environment leads to aging and brittle cracking of the shell
1. Check if the internal terminals are damaged. If only the outer shell is damaged, it can continue to be used; If the terminal is deformed or has poor contact, the module needs to be replaced; 3. Improve installation environment and stay away from high temperature sources
The wiring terminal cannot be tightened
1. Mismatch of screwdriver specifications leads to screw slippage; 2. The internal spring of the terminal has failed; 3. If the wire specification is too large, it will block the terminal
1. Replace the screwdriver with a matching specification; 2. Replace the faulty terminal or the entire module; 3. Replace the wires that meet the specifications or crimp the adapter terminals
Maintenance and Precautions
-During regular inspections, it is important to focus on checking the fastening of module wiring terminals, whether the casing is intact, and whether the wires are aged or damaged. It is recommended to conduct a comprehensive inspection once every quarter, and in harsh environments, it can be shortened to once a month.
-When cleaning the module, it is necessary to turn off the power and use a dry brush or compressed air to remove dust from the terminals and the surface of the housing. It is forbidden to use wet cloths or corrosive cleaning agents to prevent moisture from seeping into the interior of the module and causing short circuits.
-When replacing a module, it is necessary to ensure that the new module model is consistent with the original module (57619414 A is the key model identification), and record the original wiring correspondence before replacement to avoid wiring errors; After replacement, it is necessary to re tighten the terminals and test the signal transmission situation.
-It is prohibited to connect signals or power sources exceeding the rated voltage or current to the module terminals to avoid overloading that may cause terminal burnout, module damage, and ultimately lead to a wider range of system failures.
- User name Member Level Quantity Specification Purchase Date
- Satisfaction :
-


