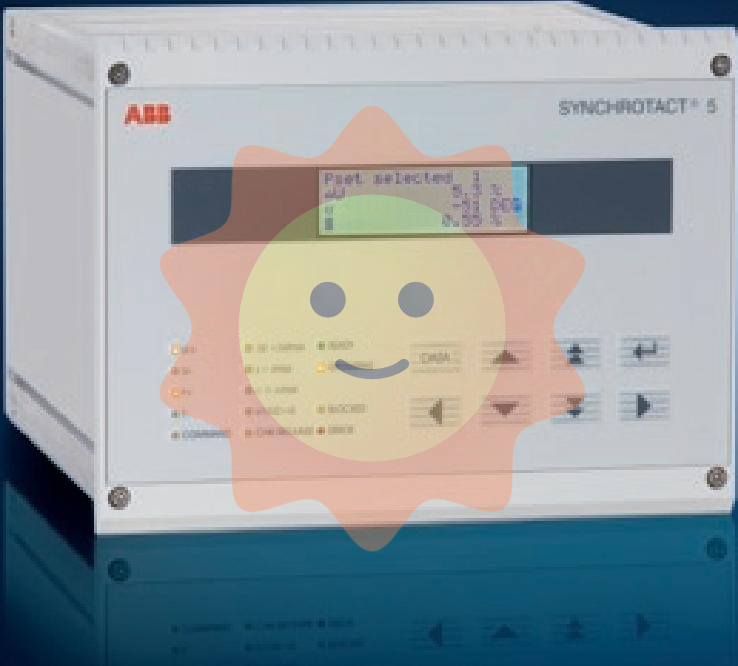
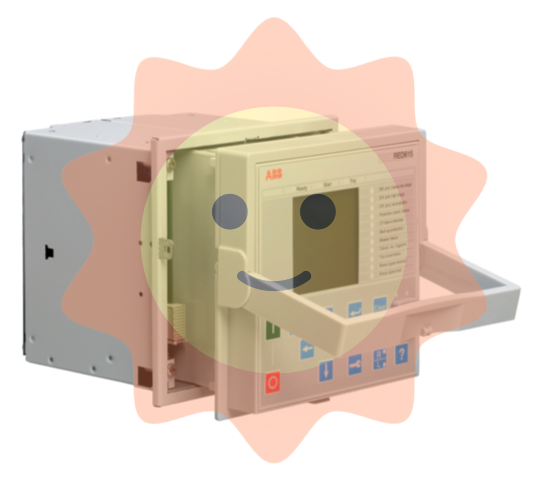
The ABB RED615 panel serves as the core interaction bridge between equipment and people, and its layout design balances professionalism and usability, covering the full range of operational and maintenance needs. Technicians need to master the layout structure and operation logic of the panel proficiently during use, attach importance to daily maintenance work, and quickly locate and solve common problems in order to fully play the core role of RED615 relay in distribution network protection and control, and ensure the safe and stable operation of the power grid.
ABB RED615 panel
Core functional positioning of the panel
The core value of RED615 panel lies in achieving "local visual monitoring+convenient operation control", which specifically carries three core functions:
1. State perception function: Real time display of relay operation status (such as normal, fault, alarm), power status, input and output signal status, and protection setting on/off status, providing intuitive equipment operation snapshots for operation and maintenance personnel.
2. Operation control function: supports local setting modification, protection function on/off, manual opening and closing operation, reset operation, and parameter configuration, meeting debugging and emergency operation requirements.
3. Fault tracing function: Recent fault records (such as fault type, fault current, action time) can be retrieved through button operation, providing raw data support for fault analysis.
Detailed explanation of panel layout structure
The RED615 panel adopts a standardized modular design, with a clear and orderly layout. It is divided into three main parts: the display area, the operation button area, and the status indicator area. Some models include an expansion interface area, and the functions of each area are independent and interrelated.
2.1 Display Area: Information Presentation Core
The display area usually adopts a 128 × 64 dot matrix LCD screen, which supports switching between Chinese or English interfaces and has backlight function (automatically lights up when the light is insufficient). The main display content is divided into three categories:
-Main interface information: default display of relay model (RED615), software version, current time, operating mode (such as "run", "debug", "exit"), and core electrical parameters (such as three-phase voltage, current, power factor).
-Menu interface information: After entering the sub menu through the button, the list of fixed value groups, protection function status, fault record details, parameter configuration items, etc. are displayed, using a hierarchical menu structure with clear logic.
-Alarm/Fault Reminder: When the device encounters an abnormality, the display screen automatically jumps to the alarm interface, displaying the alarm type (such as "overcurrent alarm" or "voltage abnormality"), occurrence time, and related parameters in flashing font, while coordinating with the status indicator light to provide linked reminders.
2.2 Operation button area: human-computer interaction entrance
The button area is located below the display screen and uses silicone buttons that are anti misoperation and wear-resistant. There are a total of 10 core buttons, which can be divided into three categories according to their functions: "navigation buttons", "function buttons", and "emergency operation buttons". The specific functions are shown in the table below:
Button type
Button identification
core functionality
Navigation buttons
↑/↓/←/→
Menu option switching, parameter value adjustment, cursor movement
ENTER (confirm)
Confirm the selected option, save parameter settings, and enter the submenu
ESC (Exit)
Return to the previous menu, cancel the current operation, exit editing mode
MENU (Menu)
Directly enter the first level menu from the main interface and quickly start the configuration function
function key
F1/F2 (custom)
Custom functions can be configured through software, such as "Retrieve Set Value Group 1" and "View Fault Records"
INFO (Information)
One click view of device basic information (model, version, IP address, etc.)
Emergency operation button
RESET (Reset)
Clear the alarm status, reset the relay action signal, and restore normal operation
TEST (Test)
Activate the local self-test function to check if the panel display, buttons, and indicator lights are functioning properly
2.3 Status indication area: intuitive status feedback
The status indicator area is located on the left or top of the panel, using LED indicator lights (red, green, yellow) arranged by function group. Different colors and flashing modes represent different statuses. The core indicator lights have the following meanings:
-Power status light (green): Constant light indicates normal connection of DC/AC power supply; Flashing indicates unstable power supply voltage; Turning off indicates a power failure.
-Running status light (green): Constant light indicates that the relay is running normally; Flashing indicates being in debugging mode; Turning off indicates that the device has not been started.
-Protection action light (red): Constant light indicates that the protection function has been activated (such as tripping); Flashing indicates that the protection action has not been reset; Extinguishing indicates no protective action.
-Warning light (yellow): Constant light indicates the presence of non emergency alarms (such as parameter exceeding limits); Flashing indicates the presence of an emergency alarm (such as hardware failure); Extinguishing indicates no alarm.
-Input/output light (green/yellow): A constant green light indicates that the input signal is normal; Yellow constant light indicates that the output signal is valid (such as tripping the outlet); Flashing indicates abnormal signal.
2.4 Expansion interface area (optional)
Some RED615 models have expansion interfaces below the panel, including:
-RS485 communication interface: used for local connection and debugging of computers, to achieve parameter configuration and data upload.
-USB interface: used for exporting fault records and upgrading software versions.
-Test interface: used to connect testing instruments and perform protection function verification.
Core logic and process of panel operation
The RED615 panel operation follows the logic of "hierarchical menu+permission control", and the core operation process is as follows:
3.1 Basic Operations: Status Viewing
After the device is powered on, the panel automatically enters the main interface to directly view the operating status and core parameters.
2. Press the "INFO" button to quickly switch to the device information interface and view basic data such as model and version.
When there is an alarm/fault, use the "↑/↓" keys to switch in the alarm list and view detailed information.
3.2 Core Operations: Parameter Configuration and Fixed Value Modification
1. Press the "MENU" key to enter the first level menu, use the "↑/↓" keys to select the "Fixed Value Configuration" option, and press "ENTER" to confirm.
2. Enter the operation password (the default password can be found in the manual, it is recommended to modify it after the first use), verify it and enter the fixed value group list.
3. Select the target setting group (such as "overcurrent protection setting"), press "ENTER" to enter editing mode, use the "←/→" keys to move the cursor, and use the "↑/↓" keys to adjust the value.
After completing the numerical modification, press "ENTER" to confirm. The system prompts "Save?". Press "ENTER" again to complete the save, and press "ESC" to cancel the modification.
After the modification is completed, press the "ESC" key to return to the main interface step by step, ensuring that the parameters take effect.
3.3 Emergency Operation: Reset and Self Test
-Reset operation: When the device experiences an alarm or protective action, confirm that the fault has been resolved, press the "RESET" button for 3 seconds, the alarm light will turn off, and the device will resume normal operation.
-Self check operation: Press the "TEST" button, all indicator lights on the panel will flash in sequence, and the display screen will show "Self check in progress". After the self check is completed, it will prompt "Self check normal" or specific fault point (such as "Key F1 fault").
Daily maintenance and common problem handling of panels
To ensure the long-term stable operation of the panel, it is necessary to pay attention to daily maintenance and master common problem handling methods:
4.1 Key points of daily maintenance
-Cleaning and maintenance: Wipe the panel with a dry soft cloth every week to remove dust; If there is oil stains, you can dip a small amount of neutral cleaner and gently wipe it to prevent liquid from seeping into the gaps between the buttons.
-Button check: Press all buttons every month to confirm clear feedback and effective operation, avoiding button jamming.
-Display and indicator light inspection: Regularly check whether the display screen is clear and free of flickering, whether the color and status of the indicator lights are normal, and promptly handle any abnormalities found.
-Interface protection: When the expansion interface is not in use, it is necessary to cover it with a dust cover to prevent dust from entering and affecting communication.
4.2 Common Problems and Solutions
Frequently Asked Questions
Possible reasons
Solution
The display screen is not showing, and the power light is off
Power supply not connected or power module failure
1. Check if the power wiring is secure; 2. Measure whether the power supply voltage is normal; 3. Replace the power module
No response to button operation
Button stuck or panel circuit malfunction
1. Clean the gaps between the buttons and check for any foreign objects stuck; 2. Try restarting the device; 3. Contact the manufacturer to repair the panel
The alarm light is constantly on, but there is no detailed information on the display screen
Alarm information not synchronized or software failure
1. Press the "RESET" button to reset; 2. Connect to the computer through a communication interface to read background alarm information; 3. Upgrade software version
Cannot save fixed value after modification
Insufficient permissions or storage module failure
1. Confirm that the input operation password has modification permission; 2. Check if the storage module is functioning properly; 3. Reset after restoring factory settings
- User name Member Level Quantity Specification Purchase Date
- Satisfaction :
-


