

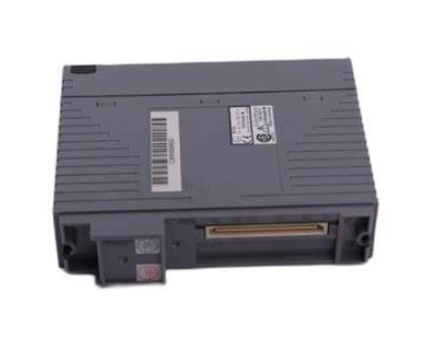
YOKOGAWA F3NC02-0N is a high-performance pulse output positioning module launched by Yokogawa Electric in Japan. It belongs to the FA-M3 series of rangeless controller system products and its core function is to achieve high-precision position control of external actuators such as servo motors and stepper motors through pulse output. This module needs to be installed on the I/O slot of the FA-M3 series basic module, which can output precise pulse signals according to the instructions of the CPU module, achieve independent motion and synchronous interpolation control of single or multiple axes, and also have external device status monitoring, parameter configuration, and I/O interaction functions. With stable pulse output performance and flexible control logic, it is widely used in various industrial automation scenarios that have strict requirements for positioning accuracy and motion coordination.
YOKOGAWA F3NC02-0N positioning module
Product Overview
YOKOGAWA F3NC02-0N is a high-performance pulse output positioning module launched by Yokogawa Electric in Japan. It belongs to the FA-M3 series of rangeless controller system products and its core function is to achieve high-precision position control of external actuators such as servo motors and stepper motors through pulse output. This module needs to be installed on the I/O slot of the FA-M3 series basic module, which can output precise pulse signals according to the instructions of the CPU module, achieve independent motion and synchronous interpolation control of single or multiple axes, and also have external device status monitoring, parameter configuration, and I/O interaction functions. With stable pulse output performance and flexible control logic, it is widely used in various industrial automation scenarios that have strict requirements for positioning accuracy and motion coordination.
Specification parameters
-Communication and output specifications: using pulse output control mode, supporting differential signal output; Equipped with pulse+direction and CW/CCW control modes, suitable for mainstream servo/stepper drive systems;
-Transmission and control performance: Pulse output frequency range of 10Hz~1MHz, capable of achieving high-precision subdivision control; Supports single axis independent control and multi axis linear interpolation motion, with a maximum of 4 interpolation axes supported; Position command range -2147483648~2147483647 (reference units);
-Control function: It has two core modes: position control and speed control, and supports variable speed and target position correction during motion; Built in position deviation monitoring, overtravel protection and other safety control logic;
-Compatible with standard servo drivers and stepper motor drivers, supporting linkage with external sensors and actuators through I/O signals;
-Environmental adaptability: Operating temperature range of 0-40 ℃, relative humidity of 25% -80% RH, suitable for indoor installation; Avoid strong vibrations, impacts, rain, direct sunlight, and corrosive gas environments;
-Transmission medium: Pulse signal transmission requires the use of twisted pair shielded wire (STP), with both ends of the shielding layer grounded to enhance anti-interference capability;
-Warranty information: The standard warranty period is 1 year, and the acceptance period is 7 days.
Performance characteristics
-High precision pulse control: With a pulse output frequency of up to 1MHz and a differential signal output design, it has strong transmission stability and can achieve micrometer level positioning accuracy, fully meeting the requirements of precision manufacturing scenarios;
-Flexible control mode: supports pulse+direction and CW/CCW control modes, suitable for different types of driving devices; Equipped with dual control modes of position and speed, supporting parameter adjustment during motion and adapting to complex motion trajectory requirements;
-Multi axis collaboration capability: Supports up to 4-axis linear interpolation motion, enabling multi axis synchronous start stop and precise trajectory collaboration, improving equipment motion coordination and processing efficiency;
-Improve safety protection: Built in functions such as position deviation exceeding limit alarm, overtravel protection, pulse loss detection, etc., can respond to abnormal working conditions in a timely manner, avoiding equipment damage and production accidents;
-Convenient linkage control: realize linkage with external sensors, grippers and other devices through I/O interfaces, support automation control of complex process flows, and reduce the difficulty of system integration;
-Strong anti-interference performance: adopting shielded wire transmission design and differential signal output, effectively resisting electromagnetic interference in industrial sites, ensuring the accuracy and stability of pulse signal transmission.
Working principle
The core working principle of YOKOGAWA F3NC02-0N positioning module is to receive control instructions from the CPU module, output precise pulse signals to drive external actuators (servo/stepper motors) to complete positioning motion, and achieve closed-loop control through feedback signals. The module first establishes communication with the FA-M3 series basic module and CPU module through slot type connection, receiving motion control instructions (such as target position, motion speed, control mode, etc.) and configuration parameters (such as pulse mode, interpolation axis number, protection threshold, etc.) issued by the CPU.
The module parses CPU instructions into corresponding pulse signal parameters, outputs pulses at a set frequency (pulse+direction or CW/CCW mode) through a differential output interface, and drives servo/stepper drivers to control motor operation; At the same time, real-time feedback signals from the motor encoder and external limit switch signals are collected through the input interface to calculate the deviation between the current actual position and the target position, and the deviation data is uploaded to the CPU module. In the scenario of multi axis interpolation, the module synchronously outputs multi axis pulse signals through precise timing control, ensuring that each axis moves in coordination with the preset trajectory and achieves linear interpolation function.
In addition, the module has built-in safety control logic that monitors position deviation, pulse transmission status, and external limit signals in real time. When abnormal situations such as overtravel or pulse loss are detected, the pulse output is immediately stopped and an alarm signal is issued, while feedback is sent to the CPU module to trigger the protection mechanism. Through the linkage between I/O interfaces and external devices, the module can achieve automated triggering and status feedback of the motion process, ensuring the stable and accurate operation of the entire positioning control system.
Precautions
(1) Installation precautions
-The installation environment must meet the specifications: it can only be installed indoors, avoiding environments with temperatures exceeding 0-40 ℃ and humidity exceeding 25% -80% RH; Stay away from areas with rain, dripping water, and direct sunlight; Avoid places with strong vibrations, impacts, large amounts of dust, salt spray, corrosive gases (such as sulfur dioxide, ammonia, hydrogen sulfide, etc.), and metal powders; Stay away from areas with strong external noise, electromagnetic waves, large amounts of static electricity, and high-frequency interference (such as frequency converters and thyristor circuits);
-Installation operation specifications: Installation must be carried out by professional engineers or skilled technicians; The module needs to be firmly fixed in the designated slot of the FA-M3 series basic module to ensure reliable connection and avoid communication interruption or control failure caused by looseness;
-Distance requirement: Maintain a safe distance from high-voltage equipment and power equipment to avoid installation on the same board; The distance from the power cord should not be less than 200mm to improve anti-interference performance; Reserve sufficient heat dissipation space around the module to avoid installation above high-temperature equipment such as heaters and transformers.
(2) Wiring precautions
-Power off operation prerequisite: Before wiring, all relevant equipment power must be turned off, and the power cable must be confirmed to have no voltage before wiring to prevent electric shock or equipment damage;
Cable specifications: Pulse signal transmission must use twisted pair shielded wire (STP), and the shielding layer must be reliably grounded at both ends (grounding resistance less than 10 Ω) to ensure anti-interference performance; The cable connector terminals should match the current load and terminal size to avoid poor contact;
-Wiring requirements: Connect cables correctly according to the wiring diagram in the product manual or label; The input signal line should be kept away from instrument cables, power lines, and load cables to avoid interference; Noise filters should be installed in areas prone to interference, and the filters should be grounded. The wiring between the output end and the power connector should be as short as possible, and fuses or switches should not be installed at the output end to avoid reducing the filtering effect;
-Tightening and sealing: The connector terminals need to be tightened to the specified torque according to the screw size; Unused cable entrances need to be sealed and fastened with dedicated seals to ensure the protection level of the casing; After the wiring is completed, it is necessary to confirm that the electrical wiring cover is fully installed in place;
Special adaptation: Capacitors or lightning protection varistors that improve power factor must not be installed on the pulse output side. If installation is necessary, they must be moved to the input side; If switch devices need to be installed on the output side, it is necessary to ensure that the module output current is zero when the switch is activated to avoid damaging the equipment;
(3) Precautions for operation and maintenance
-Rated parameter usage: Strictly use the equipment within the rated specifications of the product, and exceeding the specifications may cause equipment failure or malfunction;
Power on status taboo: When the device is powered on, do not touch any terminals, and do not open the device cover or shell; Do not replace terminal plugs during operation; Static electricity in the human body may damage sensitive internal components, and electrostatic discharge (ESD) regulations must be followed before operation;
-Lid opening restriction: Do not open the lid in humid weather or environments; The protection level of the equipment fails when the lid is open. After the operation is completed, the lid needs to be tightened with both hands to ensure that the shell is tightly attached to the lid;
-Exception handling: If abnormal heating, odor, noise, smoke or malfunction of the equipment is found, the input power supply and other related operations should be immediately cut off, and the Yokogawa sales office should be contacted for handling;
-Regular maintenance: Regularly check whether the equipment and accessories are damaged due to heating or other factors, and check whether the connectors or screws are loose (power must be turned off before inspection); The equipment casing is coated with anti-static agent, and should be gently wiped with a soft dry cloth during cleaning. Wet cloth should not be used to avoid reducing the anti-static effect;
-Professional operation requirements: Maintenance, wiring, and overhaul work must be carried out by professional personnel, and safety covers must not be dismantled without authorization.
- User name Member Level Quantity Specification Purchase Date
- Satisfaction :
-


-
 ENOTEC Analyzer Family Selection Guide
 -
 ENOTEC OXITEC 500E Oxygen Analyzer
 -
 KUKA KR CS Box-2 Compact Controller for Four Axis SCARA Robot
 -
 KUKA KR C5 slim-2 Robot Controller
 -
 KUKA KR C5 micro KSS troubleshooting
 -
 KUKA KR C5 micro debugging and troubleshooting
 -
 KUKA KR C5 Controller Assembly and Troubleshooting
 -
 KUKA KR C5 Cabinet Assembly and Troubleshooting
 -
 KUKA KR C4 Smallsize-2 Debugging Guide
 -
 KUKA KR C4 Midsize Assembly Guide
 -
 ENOTEC OXITEC 5000 Oxygen Analyzer Maintenance Guide
 -
 KUKA KR C4 extended assembly and debugging
 -
 KUKA KR C4 compact assembly and debugging
 -
 KUKA Sunrise Cabinet Med Medical Collaborative Robot Special Control Cabinet
 -
 KUKA Sunrise Cabinet Next Generation Small Control Cabinet
 -
 KUKA KR C4 Smallsize-2 family's smallest control cabinet
 -
 KUKA KR C4 Midsize Fault Diagnosis
 -
 KUKA KR C4 extended is a high-power multi axis control cabinet
 -
 Troubleshooting and Maintenance of KUKA KR C4 Control Cabinet
 -
 Troubleshooting and Maintenance of KUKA KR C4 Compact Control Cabinet
 -
 KUKA KR15 DELTA-2 V2 Robot Installation and Debugging
 -
 KUKA TITAN-2 Ultra Assembly and Maintenance Guide
 -
 KUKA KR SCARA-2 CS Assembly, Debugging, and Operation Guide
 -
 Troubleshooting KUKA SCARA X
 -
 Troubleshooting of KUKA KR FORTEC-2 ultra
 -
 Troubleshooting of KUKA KR FORTEC-2
 -
 Troubleshooting KUKA KR 1000 Titan
 -
 Troubleshooting of KUKA KR 600 FORTEC
 -
 KUKA KR 500 MT FORTEC Maintenance and Inspection
 -
 KUKA KR 360 FORTEC Inspection and Maintenance Guide
 -
 Troubleshooting KUKA Sunrise Cabinet Med
 -
 KUKA KR SCARA HO Assembly and Maintenance
 -
 KUKA QUANTEC-2 PA maintenance troubleshooting
 -
 KUKA QUANTEC-2 K/P Maintenance Troubleshooting Guide
 -
 KUKA QUANTEC-2 HO Maintenance Guide
 -
 KUKA KR QUANTEC-2 HC Maintenance and Rescue Guide
 -
 KUKA KR QUANTEC-2 Maintenance Troubleshooting Guide
 -
 KUKA KR QUANTEC PA series heavy-duty palletizing robot
 -
 KUKA KR IONTEC-2 Debugging and Maintenance Guide
 -
 KUKA KR IONTEC ultra series six axis heavy-duty industrial robot
 -
 KUKA KR IONTEC HO Maintenance Troubleshooting Guide
 -
 KUKA KR CYBERTECH-3 HW maintenance troubleshooting
 -
 KUKA KR CYBERTECH-3 maintenance troubleshooting
 -
 KUKA KR8 R2100-2 arc HW maintenance troubleshooting
 -
 KUKA KR CYBERTECH nano-2 maintenance troubleshooting
 -
 KUKA KR 20 R1810 HO maintenance troubleshooting
 -
 KUKA CYBERTECH maintenance troubleshooting
 -
 KUKA KR CYBERTECH CR maintenance troubleshooting
 -
 KUKA KR AGILUS-3 ultra maintenance troubleshooting
 -
 KUKA KR 300 R2700-2 C-F maintenance troubleshooting
 -
 KUKA KR 20 R1820-2 E Maintenance Troubleshooting and Replacement Practice
 -
 KUKA AGILUS-3 troubleshooting
 -
 KUKA KR AGILUS-2 maintenance troubleshooting
 -
 KUKA KR 1000 titan PA troubleshooting
 -
 KUKA KR 700 PA maintenance troubleshooting
 -
 KUKA KR18 R1450-3 PP Operation and Maintenance Essentials
 -
KUKA KR12 SCARA Operations Essentials
-
 KUKA KR4 R600 Operation and Maintenance Essentials
 -
 KUKA KR 3 AGILUS Operation and Maintenance Safety Essentials
 -
 KUKA LBR iiwa CR Cleanroom Troubleshooting and Maintenance
 -
 Troubleshooting and Maintenance of KUKA KR AGILUS sixx
 -
 KUKA KR60 SCARA CS Maintenance Guide
 -
 KUKA KR 23 SCARA-2 Robot Installation and Maintenance Detailed Explanation
 -
 KUKA KR 20 SCARA CS Robot Selection and Maintenance Guide
 -
 KUKA KR 15 DELTA-2 Robot Installation and Maintenance
 -
 KUKA KR 13 SCARA-2 CS Detailed Explanation
 -
 KUKA KR 3 D1200 Robot Operation and Maintenance
 -
 KUKA KR 3 D1200 HM Robot Operation and Maintenance Guide
 -
 KUKA LBR Med Medical Robot Integration Guide
 -
 KUKA iiwa Robot Safety Operation and Maintenance
 -
 KUKA LBR iiwa CR Operations and Troubleshooting
 -
 Lauer PCS Series Operation Console Configuration Guide
 -
 Installation and Maintenance Guide for KUKA LBR iisy Series Collaborative Robots
 -
 KUKA LBR iisy 3 R760 Collaborative Robot Debugging Guide
 -
 KUKA LBR iico Robot Installation and Debugging Technical Guide
 -
 Lauer Starline LCA 300/320/325 Text Display Application Guide
 -
 Lauer PCS 950 Operation Console Application Guide
 -
 Lauer EPC series industrial computer configuration
 -
 Bonfiglioli Precision Planetary Gearbox Selection and Application Guide
 -
 Installation and heat dissipation of Bonfiglioli Vectron cold plate frequency converter
 -
 Bonfiglioli Vectron EM-RES-02 Expansion Module Installation and Configuration Guide
 -
 Bonfiglioli Vectron EM-RES-01 Expansion Module Rotary Transformer Interface Configuration Guide
 -
 Bonfiglioli Vectron EM-IO-04 module KTY temperature measurement and digital port configuration
 -
 Bonfiglioli Vectron EM-IO-03 Expansion Module Dual Analog Output and PTC Configuration
 -
 Installation of Bonfiglioli Vectron EM-IO-02 Expansion Module and PTC Temperature Monitoring Configuration
 -
 Bonfiglioli Vectron EM-IO-01 Expansion Module Installation and System Bus Configuration Guide
 -
 Bonfiglioli F series gearbox spare parts identification and replacement guide
 -
 Installation, maintenance, and troubleshooting of Bonfiglioli HF series reducers for hoisting applications
 -
 Bonfiglioli 300 series reducer installation, maintenance, and troubleshooting guide
 -
 Selection and integration guide for Bonfiglioli R3 series planetary gearboxes in primary crushing equipment
 -
 Bonfiglioli C-series ATEX gearbox selection and explosion-proof application guide
 -
 Bonfiglioli Vectron EM-ENC-05 Full Function Expansion Module Integration Guide
 -
 Bonfiglioli Vectron EM-ENC-04 Multi functional Expansion Module Complete Configuration Guide
 -
 Bonfiglioli Vectron EM-ENC-03 Second Encoder Interface and System Bus Expansion Guide
 -
 Bonfiglioli Vectron EM-ENC-02 Expansion Module Integration and Encoder Interface Guide
 -
 Bonfiglioli Vectron CM-CAN CANopen Communication Configuration and DS402 Control Guide
 -
 Bonfiglioli Vectron EM-SYS System Bus Networking and Virtual Link Configuration Guide
 -
 Bonfiglioli Vectron CM-PDP Profibus DP Configuration and Debugging Guide
 -
 Bonfiglioli Vectron CM-232/485 Modbus Communication Configuration Guide
 -
 Bonfiglioli BMS series servo reduction motor selection and integration guide
 -
 Bonfiglioli ACTION 210/410 Inverter Debugging and Fault Diagnosis Complete Guide
 -
 Honeywell Enhanced Micro TDC 3000X System Redundancy Architecture and Maintenance Guide
 -
 Selection and Configuration of Bonfiglioli Active Series Inverter
 -
 Installation, Maintenance, and Troubleshooting Guide for Bonfiglioli HDP/HDO Series Heavy duty Gearboxes
 -
 Installation, Maintenance, and Troubleshooting Guide for Bonfiglioli 300/300M Series Gearboxes
 -
 Bonfiglioli 300M planetary gearbox selection and thermal verification guide
 -
 Bonfiglioli 3/H series heavy-duty gearbox selection and verification guide
 -
 Bonfiglioli KRG/KCG/KSD Hydraulic Coupling Selection and Integration Guide
 -
 Bonfiglioli BTD/BCR Servo Motor System Integration and Interface Configuration Guide
 -
 Bonfiglioli BTD/BCR Synchronous Servo Motor Selection and Interface Configuration Guide
 -
 Bonfiglioli VF-W series ATEX explosion-proof reducer selection guide
 -
 Bonfiglioli EM-ENC-03 Expansion Module Configuration and System Bus Integration Guide
 -
 Bonfiglioli EVOX CP Explosion proof Reducer: Quick Guide for Installation and Maintenance
 -
 Bonfiglioli C/A/F/S Reducer ATEX Installation and Maintenance Practice Guide
 -
 Bonfiglioli BXN/MXN Motor Installation and Brake Maintenance Complete Guide
 -
 Bonfiglioli VF-W IE2/IE3 Worm Gear Reducer: Energy Efficiency Selection and Application Practice Guide
 -
 Bonfiglioli VF-W Explosion proof Worm Gear Reducer: ATEX Selection and Installation Complete Guide
 -
 Selection and Calculation of Bonfiglioli RAN Right Angle Gearbox
 -
 Bonfiglioli Industrial Transmission System Selection Guide
 -
 Bonfiglioli EVOX Gearmotor Selection and Configuration Guide
 -
 Bonfiglioli CAFS Reducer Selection and Application Guide
 -
 Bonfiglioli C-A-F gearbox selection and maintenance
 -
 Bonfiglioli C Series ATEX Explosion proof Reducer Selection
 -
 Bonfiglioli BN-BE-BX Series Motor Selection Guide
 -
 Bonfiglioli BMD Servo Motor Selection and Configuration Guide
 -
 Selection of Bonfiglioli A-series servo reducer
 -
 Bonfiglioli AS Series Reducer Installation and Maintenance Guide
 -
 Bonfiglioli Active 401/201 Inverter Selection and Application Guide


