

ABB UFC092BE01 is an industrial grade high-density binary input (DI) module, belonging to the ABB AC 800M series distributed control system signal acquisition unit. Its core function is to convert digital switch signals (such as buttons, travel switches, sensor status signals) from industrial sites into system recognizable digital signals, which are transmitted to controllers or control boards for logical operations. It is widely used in scenarios that require a large amount of digital signal acquisition, such as power, petrochemical, metallurgy, intelligent manufacturing, etc. (such as production line equipment status monitoring, large-scale unit interlock protection signal acquisition).
ABB UFC092BE01 Binary input module
Product positioning and core values
ABB UFC092BE01 is an industrial grade high-density binary input (DI) module, belonging to the ABB AC 800M series distributed control system signal acquisition unit. Its core function is to convert digital switch signals (such as buttons, travel switches, sensor status signals) from industrial sites into system recognizable digital signals, which are transmitted to controllers or control boards for logical operations. It is widely used in scenarios that require a large amount of digital signal acquisition, such as power, petrochemical, metallurgy, intelligent manufacturing, etc. (such as production line equipment status monitoring, large-scale unit interlock protection signal acquisition).
Its core value is reflected in "high-density acquisition+strong anti-interference+high reliability": a single module supports 16 binary inputs, greatly compressing the installation space of the cabinet; Adopting optoelectronic isolation and signal filtering technology to adapt to complex electromagnetic environments in industrial sites; Equipped with fault self diagnosis and channel level protection functions, ensuring signal acquisition without packet loss or misjudgment, and guaranteeing the stable operation of the control system.
Core parameters and functional characteristics
1. Key electrical and performance parameters
Input channel configuration
16 independent binary inputs (DI), supporting 24V DC drain input (compatible with source input, requiring external circuit configuration), input signal range 18-30V DC (high level effective)
Signal response performance
Channel response time ≤ 1ms (from signal triggering to module recognition), inter channel crosstalk ≤ 50 μ V, ensuring signal interference free when multiple channels are triggered simultaneously
Isolation and anti-interference
Each channel is optically isolated from the backplane bus, with an isolation voltage of 2500V AC (1 minute); Integrated RC filtering circuit for input circuit (adjustable filtering frequency of 100Hz), with anti electromagnetic interference level in accordance with EN 61000-6-2 standard
Diagnosis and status indication
Each channel is equipped with an independent LED indicator light (green constant light indicates effective signal, off indicates no signal); Module level fault indicator light (red constant light indicates power failure, flashing indicates communication failure)
Communication and power supply
Support PROFIBUS DP communication protocol (communication rate 9.6kbps-12Mbps adaptive), communicate with AC 800M controller or DAPC100 control board through DP bus; Auxiliary power supply 24V DC (input range 19-30V DC), power consumption ≤ 5W
Environmental adaptability
Working temperature -25 ℃ to 70 ℃, relative humidity 5% -95% (no condensation), protection level IP20 (module body), anti vibration performance 5-150Hz, 0.1g (sine wave vibration), anti impact performance 10g (11ms, half sine wave)
Security certification
Compliant with CE (EN 61010-1), UL (UL 508), SIL 2 (IEC 61508) safety standards, flame retardant rating UL 94 V-0
2. Core functional features
High density and flexible installation: The module size is only 45mm (width) x 100mm (height) x 120mm (depth), suitable for 35mm DIN rail installation. The 16 channel integration is 100% higher than the conventional 8-channel DI module. In scenarios with dense signal points (such as automotive assembly lines, which require monitoring the status of over 200 sensors), the number of modules used can be reduced by 50%, significantly reducing cabinet space.
Wide voltage compatibility and polarity protection: Supports 18-30V DC wide range input, compatible with different specifications of sensor power supplies in industrial sites (such as 24V DC switch power supplies, 27V DC equipment power supplies); The input circuit has polarity reversal protection, so even if the positive and negative poles are reversed, the module will not be damaged (only no signal output), reducing the risk of installation and wiring errors.
Channel level diagnosis and fault isolation: The status of each channel (normal/open/short) can be read in real time through the PROFIBUS DP bus. When a certain channel triggers an abnormality due to sensor failure (such as wire short circuit), the module only marks the fault of that channel and does not affect the signal acquisition of other channels; The fault information is automatically uploaded to the system monitoring station, making it easy for operation and maintenance personnel to quickly locate the fault point (such as a short circuited sensor circuit).
Anti interference and signal stability: Each channel is designed with independent optoelectronic isolation, which can suppress common mode interference and differential mode interference generated by high-power equipment (such as frequency converters and motors) in industrial sites; The RC filtering circuit can filter high-frequency noise (such as signal jitter caused by electromagnetic radiation), ensuring that the signal acquisition accuracy still reaches 99.99% in complex electromagnetic environments (such as steel rolling workshops in steel mills).
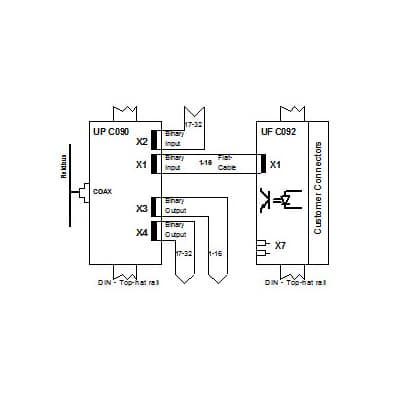
Adaptation devices and collaborative applications
1. Core adaptation equipment
Controller/Control Board
ABB AC 800M controller (such as PM864K01), ABB DAPC100 3ASC25H203 control board, signal upload through PROFIBUS DP bus
Signal conversion unit
ABB DSTF610 terminal unit (using TK520 cable to transfer sensor signals for wiring management and signal preprocessing), ABB TU515 terminal unit (suitable for signal transfer in simple scenarios)
External sensors/switches
24V DC photoelectric sensor (such as ABB O5F series, NPN output, leakage signal), travel switch (such as ABB LS45 series, normally closed/normally open contacts), button switch (such as ABB M2SS series, 24V DC reset type)
Auxiliary equipment
ABB PROFIBUS DP bus connector (3RK1901-1BB00), redundant power module (PM861K01-R, providing dual power backup for the module), signal isolator (such as ABB AI801 Isolator, enhancing weak signal anti-interference capability)
2. Collaborative application case with DAPC100 control board and DSTF610: Chain protection system for petrochemical reaction kettle
System architecture: The reactor needs to monitor 12 critical status signals (such as high pressure alarm, high temperature alarm, stirring motor operation status, and feed valve switch status). When any signal triggers an "abnormality", the system needs to immediately stop feeding and activate the emergency pressure relief valve, involving 16 DI signal acquisition (including 4 backup signals) and 2 DO control signal outputs.
Connection logic:
12 sensor/switch signals (pressure switch, temperature switch, motor status feedback) are connected to DI terminals 1-12 of DSTF610 terminal unit through wires. DSTF610 is connected to the input interface of UFC092BE01 module through TK520 cable to achieve signal preprocessing and isolation;
UFC092BE01 transmits the collected digital signals to the DAPC100 control board through the PROFIBUS DP bus, and the control board runs the interlock protection logic to determine whether the signal is abnormal;
When the "high pressure" or "high temperature" signal is detected, DAPC100 triggers the DSDO 131 digital output unit through the DO interface, cuts off the power supply of the feed valve (stops feeding) and opens the pressure relief valve (emergency pressure relief), while outputting an alarm signal to the monitoring station.
Core advantage: UFC092BE01's 16 channels meet the system signal acquisition requirements (including backup channels to enhance redundancy); The photoelectric isolation and filtering function ensures that there is no interference or false alarm in the strong electromagnetic environment of the chemical workshop; The channel level diagnostic function can quickly locate faulty sensors (such as a short circuit in a temperature switch), reducing the troubleshooting time to within 10 minutes.
Installation and troubleshooting specifications
1. Installation process and key points
Rail fixation: Installed through a 35mm DIN rail, with a distance of ≥ 8mm between adjacent modules (such as DAPC100 control board, DSDO 131 unit) to ensure heat dissipation; The module needs to be installed inside the control cabinet (away from the cabinet door to avoid dust and moisture). If there are strong interfering devices such as frequency converters inside the control cabinet, the distance between the module and the module should be ≥ 30cm.
Power connection: Use a 1.5mm ² copper wire to connect the "+24V" and "GND" terminals of the redundant power module (PM861K01-R) to the module power input terminals ("V+" and "V -"). Reversing the positive and negative poles will trigger internal protection (the module is not damaged and needs to be reconnected to the correct polarity to resume operation).
Signal and communication wiring:
Input signal: The output terminal of DSTF610 terminal unit is connected to the DI terminals ("DI1" to "DI16") of UFC092BE01 through a 1.0mm ² shielded twisted pair cable. The shielding layer is grounded at one end (module side), and the signal transmission distance is ≤ 200m (signal repeater needs to be added for over distance);
Communication bus: Use PROFIBUS DP cable to connect the "DP IN" and "DP OUT" terminals of the module to the DP interface of the controller/control board. The module at the end of the bus needs to be connected to a 120 Ω terminal resistor (enabled by the module side dip switch).
Address setting: Use the 8-bit dip switch on the side of the module to set the PROFIBUS DP address (range 1-126), ensuring that it does not overlap with other DP slave addresses in the system (if set to 10, it needs to be configured accordingly in the Control Builder M software).
2. Common faults and solutions
Fault phenomenon
troubleshooting direction
No signal acquisition for all channels
Check if the auxiliary power supply voltage is within the range of 19-30V DC; Confirm if the PROFIBUS DP bus communication is normal (module "COM" light flashing indicates normal communication, constant off indicates communication interruption); If the power supply and communication are normal, it may be an internal motherboard fault of the module and needs to be replaced
Single channel without signal acquisition
Measure the input voltage of the channel with a multimeter (normally 24V DC, high level is valid); Check whether the sensor is normal (such as whether the photoelectric sensor is triggered and whether the output signal is normal); If the input voltage is normal but there is still no signal, it may be due to damage to the channel optoelectronic isolation chip, and the module needs to be replaced
Channel signal false alarm (frequent on-off)
Check if the input signal cable is laid in parallel with the power cable (such as 380V motor cable) (separate wiring is required, with a spacing of ≥ 20cm); Enable the RC filtering function of the module (set the filtering frequency to 50-100Hz through software) to filter high-frequency noise; Check for mechanical shaking of the sensor (such as poor contact of the travel switch contacts)
Communication bus interruption
Check if the A/B wires of the DP cable are reversed (module terminal "DP-A" is connected to bus "A" wire, "DP-B" is connected to bus "B" wire); Confirm whether the bus terminal resistor is installed correctly (only the terminal module is enabled); Use ABB DP diagnostic tool (such as 3RK1901-1BB00) to test the bus signal strength. If the signal attenuates, shorten the cable length or add a repeater

- User name Member Level Quantity Specification Purchase Date
- Satisfaction :
-


-
 CCS 6900G/P pressure switch
 -
 BENDER WR Transformer Selection
 -
 BENDER RCMA475LY Residual Current Monitoring
 -
 BENDER IRDH575 Insulation Monitoring
 -
 BENDER IRDH265 Insulation Monitoring and Debugging
 -
 Bender RCMA475LY residual current monitor debugging
 -
 Beckwith Electric M-3425A Generator Protection Relay Debugging Guide
 -
 Automated MEX816U Expander Troubleshooting Guide
 -
 ASEM HT2150 Industrial Tablet Selection and Troubleshooting
 -
 Troubleshooting and practical application of Advantest U3771/3772 microwave spectrum analyzer
 -
 Advantest R6144 Programmable DC Voltage/Current Source (Calibration Source) Calibration and Maintenance
 -
 Aerotech UNIDEX 100/U100i single axis motion controller
 -
 Aerotech Ndrive MP Ultra Compact PWM Digital Servo Driver
 -
 Aerotech Ndrive HPe 10/20/30 High Performance PWM Digital Servo Drive
 -
 Aerotech Ndrive HLe maintenance replacement
 -
 Aerotech Ndrive CP maintenance replacement
 -
 Aerotech Ndrive Linear Drive Selection
 -
 Aerotech NDrive HL linear drive maintenance replacement
 -
 Aerotech NDrive HP 10/20/30 Maintenance and Replacement
 -
 Aerotech NDrive CP10 Servo Drive Guide
 -
 SIGMATEK TAE1941 Display Unit Replacement and Troubleshooting
 -
 SIGMATEK TAE151 Replacement and Troubleshooting
 -
 SIGMATEK AKM Servo Motor Replacement and Troubleshooting Guide
 -
 SIGMATEK S-DIAS Control System Replacement and Upgrade Guide
 -
 SIGMATEK ETT Series HMI Replacement and Selection Guide
 -
 SIGMATEK DIAS Drive 310-23 servo amplifier
 -
 SIGMATEK CCP 521 C-DIAS processor module
 -
 Megmeet L6 electric drive troubleshooting
 -
 Sysmex XN-1000/2000 Technical Guide
 -
 Sysmex XN-L blood analyzer maintenance and troubleshooting
 -
 Troubleshooting and Maintenance of Sysmex XN-9000
 -
 LTI Motion ServoOne PROFIBUS/PROFINET Troubleshooting and Replacement
 -
 Micro Innovation MICRO GF1 Touch Screen Troubleshooting and Replacement
 -
 Troubleshooting and Replacement of Micro Innovation WINbloc Distributed I/O System
 -
 MICRO PANEL GS-2 Troubleshooting and Debugging
 -
 LTi Synchronous Motor LST/LSH Replacement Selection Guide
 -
 Fault diagnosis of LTi CDE/CDB3000
 -
 Maintenance and troubleshooting of ENOTEC SILOTEC 8000 silo analyzer
 -
 ENOTEC ENSITU 7000 Oxygen Analyzer
 -
 ENOTEC COMTEC 6000 ATEX GasEx Analyzer Maintenance, Calibration, and Troubleshooting Guide
 -
 ENOTEC Analyzer Family Selection Guide
 -
 ENOTEC OXITEC 500E Oxygen Analyzer
 -
 KUKA KR CS Box-2 Compact Controller for Four Axis SCARA Robot
 -
 KUKA KR C5 slim-2 Robot Controller
 -
 KUKA KR C5 micro KSS troubleshooting
 -
 KUKA KR C5 micro debugging and troubleshooting
 -
 KUKA KR C5 Controller Assembly and Troubleshooting
 -
 KUKA KR C5 Cabinet Assembly and Troubleshooting
 -
 KUKA KR C4 Smallsize-2 Debugging Guide
 -
 KUKA KR C4 Midsize Assembly Guide
 -
 ENOTEC OXITEC 5000 Oxygen Analyzer Maintenance Guide
 -
 KUKA KR C4 extended assembly and debugging
 -
 KUKA KR C4 compact assembly and debugging
 -
 KUKA Sunrise Cabinet Med Medical Collaborative Robot Special Control Cabinet
 -
 KUKA Sunrise Cabinet Next Generation Small Control Cabinet
 -
 KUKA KR C4 Smallsize-2 family's smallest control cabinet
 -
 KUKA KR C4 Midsize Fault Diagnosis
 -
 KUKA KR C4 extended is a high-power multi axis control cabinet
 -
 Troubleshooting and Maintenance of KUKA KR C4 Control Cabinet
 -
 Troubleshooting and Maintenance of KUKA KR C4 Compact Control Cabinet
 -
 KUKA KR15 DELTA-2 V2 Robot Installation and Debugging
 -
 KUKA TITAN-2 Ultra Assembly and Maintenance Guide
 -
 KUKA KR SCARA-2 CS Assembly, Debugging, and Operation Guide
 -
 Troubleshooting KUKA SCARA X
 -
 Troubleshooting of KUKA KR FORTEC-2 ultra
 -
 Troubleshooting of KUKA KR FORTEC-2
 -
 Troubleshooting KUKA KR 1000 Titan
 -
 Troubleshooting of KUKA KR 600 FORTEC
 -
 KUKA KR 500 MT FORTEC Maintenance and Inspection
 -
 KUKA KR 360 FORTEC Inspection and Maintenance Guide
 -
 Troubleshooting KUKA Sunrise Cabinet Med
 -
 KUKA KR SCARA HO Assembly and Maintenance
 -
 KUKA QUANTEC-2 PA maintenance troubleshooting
 -
 KUKA QUANTEC-2 K/P Maintenance Troubleshooting Guide
 -
 KUKA QUANTEC-2 HO Maintenance Guide
 -
 KUKA KR QUANTEC-2 HC Maintenance and Rescue Guide
 -
 KUKA KR QUANTEC-2 Maintenance Troubleshooting Guide
 -
 KUKA KR QUANTEC PA series heavy-duty palletizing robot
 -
 KUKA KR IONTEC-2 Debugging and Maintenance Guide
 -
 KUKA KR IONTEC ultra series six axis heavy-duty industrial robot
 -
 KUKA KR IONTEC HO Maintenance Troubleshooting Guide
 -
 KUKA KR CYBERTECH-3 HW maintenance troubleshooting
 -
 KUKA KR CYBERTECH-3 maintenance troubleshooting
 -
 KUKA KR8 R2100-2 arc HW maintenance troubleshooting
 -
 KUKA KR CYBERTECH nano-2 maintenance troubleshooting
 -
 KUKA KR 20 R1810 HO maintenance troubleshooting
 -
 KUKA CYBERTECH maintenance troubleshooting
 -
 KUKA KR CYBERTECH CR maintenance troubleshooting
 -
 KUKA KR AGILUS-3 ultra maintenance troubleshooting
 -
 KUKA KR 300 R2700-2 C-F maintenance troubleshooting
 -
 KUKA KR 20 R1820-2 E Maintenance Troubleshooting and Replacement Practice
 -
 KUKA AGILUS-3 troubleshooting
 -
 KUKA KR AGILUS-2 maintenance troubleshooting
 -
 KUKA KR 1000 titan PA troubleshooting
 -
 KUKA KR 700 PA maintenance troubleshooting
 -
 KUKA KR18 R1450-3 PP Operation and Maintenance Essentials
 -
KUKA KR12 SCARA Operations Essentials
-
 KUKA KR4 R600 Operation and Maintenance Essentials
 -
 KUKA KR 3 AGILUS Operation and Maintenance Safety Essentials
 -
 KUKA LBR iiwa CR Cleanroom Troubleshooting and Maintenance
 -
 Troubleshooting and Maintenance of KUKA KR AGILUS sixx
 -
 KUKA KR60 SCARA CS Maintenance Guide
 -
 KUKA KR 23 SCARA-2 Robot Installation and Maintenance Detailed Explanation
 -
 KUKA KR 20 SCARA CS Robot Selection and Maintenance Guide
 -
 KUKA KR 15 DELTA-2 Robot Installation and Maintenance
 -
 KUKA KR 13 SCARA-2 CS Detailed Explanation
 -
 KUKA KR 3 D1200 Robot Operation and Maintenance
 -
 KUKA KR 3 D1200 HM Robot Operation and Maintenance Guide
 -
 KUKA LBR Med Medical Robot Integration Guide
 -
 KUKA iiwa Robot Safety Operation and Maintenance
 -
 KUKA LBR iiwa CR Operations and Troubleshooting
 -
 Lauer PCS Series Operation Console Configuration Guide
 -
 Installation and Maintenance Guide for KUKA LBR iisy Series Collaborative Robots
 -
 KUKA LBR iisy 3 R760 Collaborative Robot Debugging Guide
 -
 KUKA LBR iico Robot Installation and Debugging Technical Guide
 -
 Lauer Starline LCA 300/320/325 Text Display Application Guide
 -
 Lauer PCS 950 Operation Console Application Guide
 -
 Lauer EPC series industrial computer configuration
 -
 Bonfiglioli Precision Planetary Gearbox Selection and Application Guide
 -
 Installation and heat dissipation of Bonfiglioli Vectron cold plate frequency converter
 -
 Bonfiglioli Vectron EM-RES-02 Expansion Module Installation and Configuration Guide
 -
 Bonfiglioli Vectron EM-RES-01 Expansion Module Rotary Transformer Interface Configuration Guide
 -
 Bonfiglioli Vectron EM-IO-04 module KTY temperature measurement and digital port configuration
 -
 Bonfiglioli Vectron EM-IO-03 Expansion Module Dual Analog Output and PTC Configuration
 -
 Installation of Bonfiglioli Vectron EM-IO-02 Expansion Module and PTC Temperature Monitoring Configuration
 -
 Bonfiglioli Vectron EM-IO-01 Expansion Module Installation and System Bus Configuration Guide
 -
 Bonfiglioli F series gearbox spare parts identification and replacement guide
 -
 Installation, maintenance, and troubleshooting of Bonfiglioli HF series reducers for hoisting applications


